Final Assembly
October 3, 2004
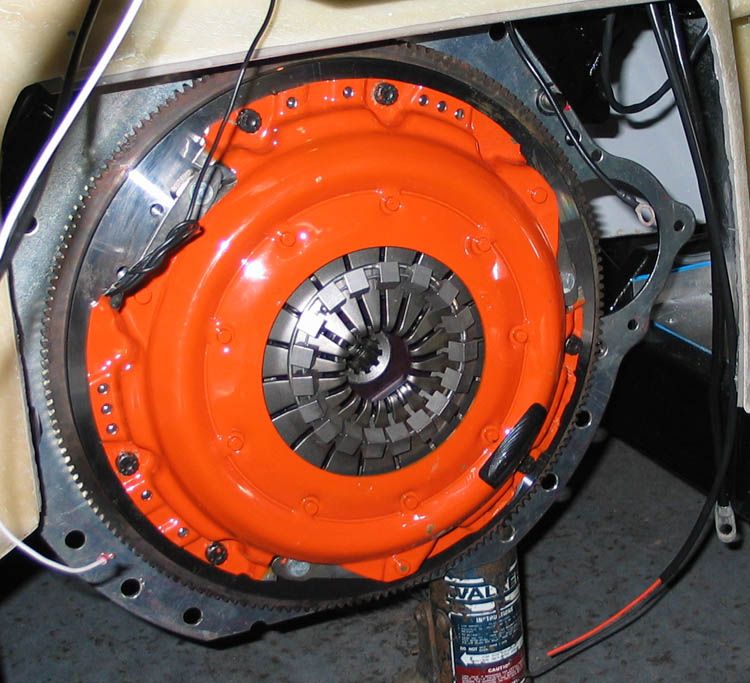
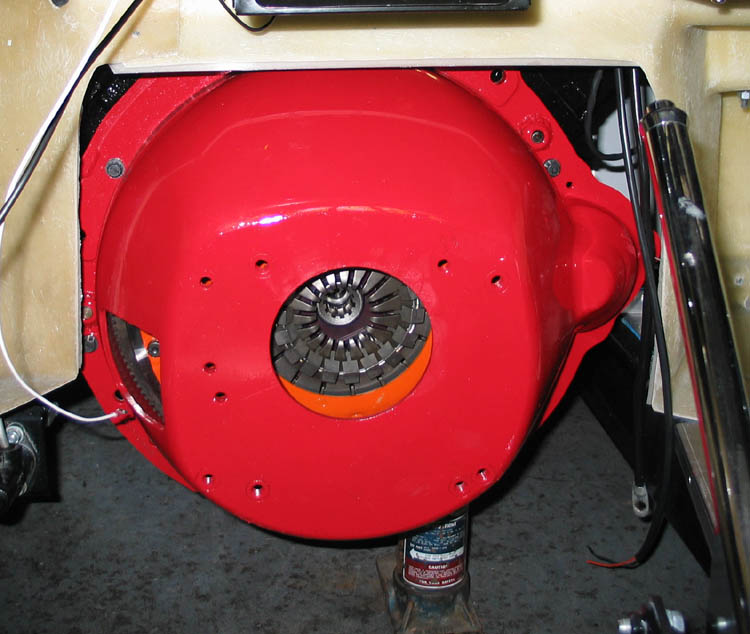
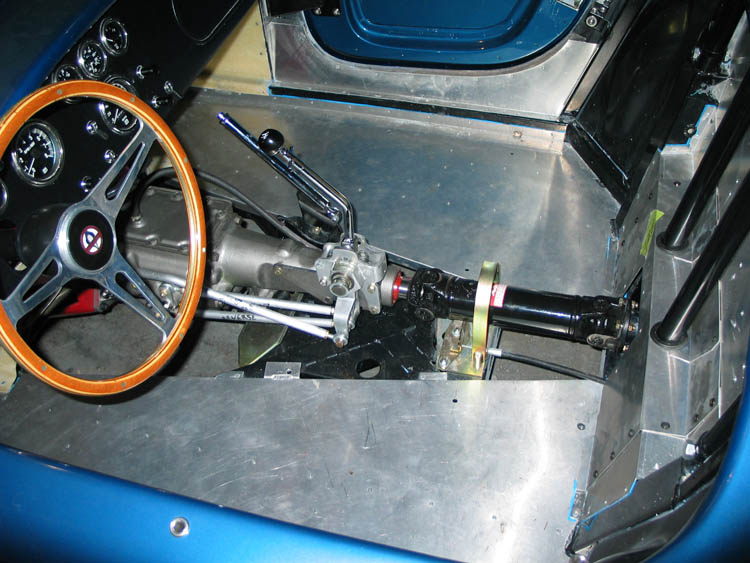
I got quite a bit done today. Installing the clutch, bellhousing, transmission and finally clutch fork was interesting through the hole in the floor. I think one of those mini lifts what lift the front and back of the car a foot or so would have come in real handy. Next I installed the driveshaft and the shifter. My brother Richard milled some on the shifter adapter plate for clearance of the reverse lever and it now works great. Thanks Richard :).
As I went to jack the car up to put it on car ramps to work on the underside of the engine I discovered a new problem. My jack won't fit under the front of the car with the suspension at or near normal ride height. So I'll have to start shopping for a new jack, most likely one of the low profile race jacks available several places. Sears has one that's pretty pricey. There are cheap knock offs on ebay that are about half the price. And there is an incredible one here, check out DK13HLQ!
![]()
October 9, 2004
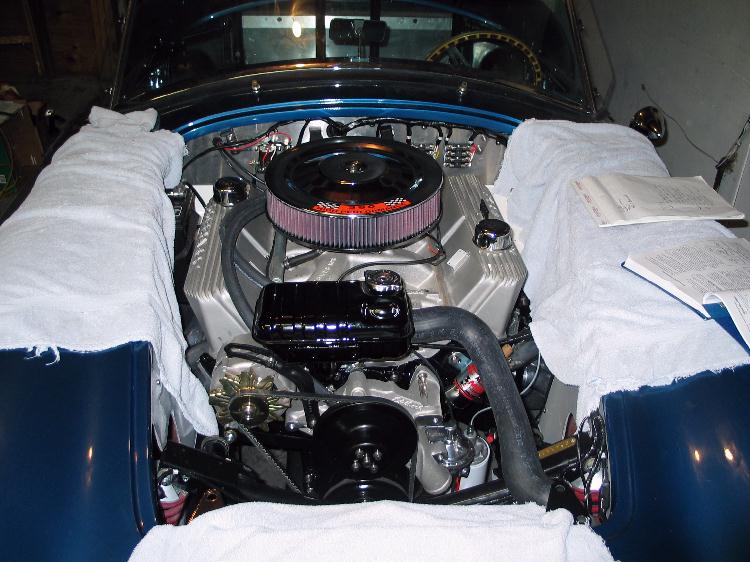
I've been bolting things on the car like crazy. I think I'm pretty much finished underneath the car, working mostly in the engine compartment now.
I took yesterday off work with the intention of hanging the exhaust while I had telephone access to the guy at ERA that does the undercar exhaust for the turnkey cars. By 10:30 I had pretty much decided the tail pipes were not going to fit. I needed maybe another inch or two to clear the body at the back. So I called ERA and asked about how the hangers they sent me should work. There wasn't any real clear answer because I have the ERA suspension and evidently they've only done one other car with undercar exhaust and this suspension. So I talked to Peter and he graciously agreed to accept another opportunity to succeed. I will be sending the tail pipes and the hardware back to let them figure it out.
In the mean time I decided to make some little dumps with hangers welded to them that will exit in front of the rear tires. This is what most people said I should do in the first place, but I wanted to be more like the original street cars.
The list of things left is getting fairly short. I don't think I will start it today, but tomorrow (Sunday) may happen, we'll see. Pretty exciting!
October 10, 2004
It's Alive!!! I got everything done on my list about 12:30 today. It almost started right up, just took a little fiddling with the distributor. I ran it at around 2000 rpm for about 15 minutes. A few issues came up, I made the coil wire too short so I'm having trouble adjusting the timing. The only show stopper was an exceptional oil leak from the left valve cover. Oil pressure was 70-80psi, just over 60psi when we were pre-lubing. Temperature rose to about 200 degrees but didn't go any higher. And best of all, drove it back into the garage under it's own power! I cut the session short because of the oil leak. And since the cam was already broken in (it was used for 1000 miles) it wasn't as critical that I do a normal break in.
October 12, 2004
Mark wanted to see a movie of one of the first drives in the cobra so here it is. It really is running like crap at the moment, it's only timed by ear, and I think the carb is running on the secondaries. I need to paint my timing marks and take the carb off to fix the secondary idle. I like to install an allen set screw in the secondary idle adjustment so I can make changes while the car is running, but I forgot in this case. In the movie I drive down the street and turn around at the island. I edited out a lot of birds chirping and other boring stuff while I was gone.
November 3, 2004
Sorry for not many updates in the last few weeks. It's been one of those periods in the project where I was scratching my head on a problem and life intervened. The problem is there is a pretty sizeable oil leak from somewhere. I think it's the transmission mostly. There could be a little bit from the oil pan too. I hope it isn't the rear main seal. Current plan is to pull the transmission and replace all the gaskets and seals which I got yesterday from David Kee (http://www.4speedtoploaders.com/).
I have also been finishing a few other items like the speedometer cable is now installed and working. Also still tuning on the engine, I installed a 3.5 power valve as an experiment. I have about 10 in/hg. vacuum at idle. Still, the idle mixture screws are not very responsive, next I plan to open the secondary idle a little to try and close the primaries a little which will hopefully get the idle circuit more involved. I expect my typical months of tuning / fiddling.
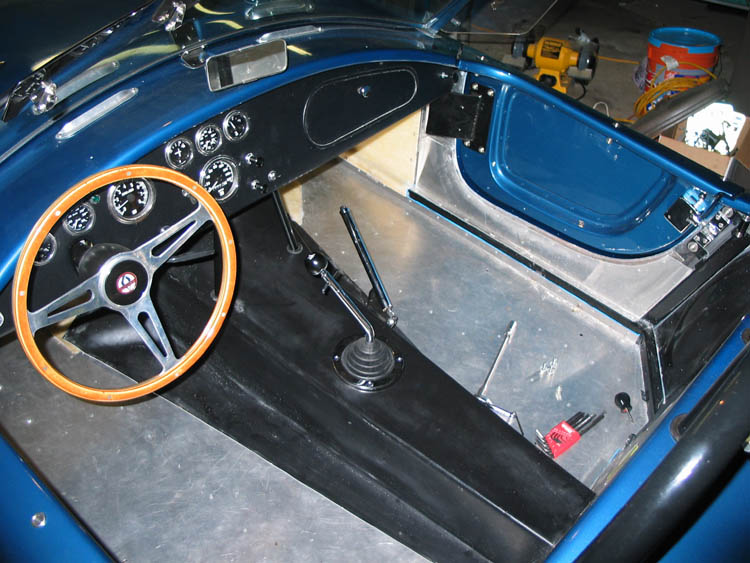
I also have been working on fitting the tunnel. Here is where it sits at the moment. The next step is to trim around the seat mounting holes and screw it down. It appears I will need to flex the tunnel a little wider to clear the shift linkage.
November 7, 2004
Had a really good day on the car on Sunday. Wendi took the kids to visit her parents, the weather was beautiful, and I got lots done.
First I finished installing the tunnel. I installed sheet metal screws along the sides after first putting a wood spacer next to the shifter linkage to make sure it wouldn't rub. Then using a 13/16" hole saw drilled out where the seat mounting holes are overlapped by the tunnel. I made a call last week to ERA and that's what they do.
Next I took the tunnel back out and removed the transmission. It had been leaking significantly from the front and a little bit on the tail shaft. When I got it apart I found there wasn't a gasket under the input shaft bearing retainer which hopefully was the cause of the leak. I also found the top cover was fairly loose. The tailshaft seal had a nick in it too.

Luckily the internals of the transmission looked great. It really was rebuilt and all the parts looked pristine.
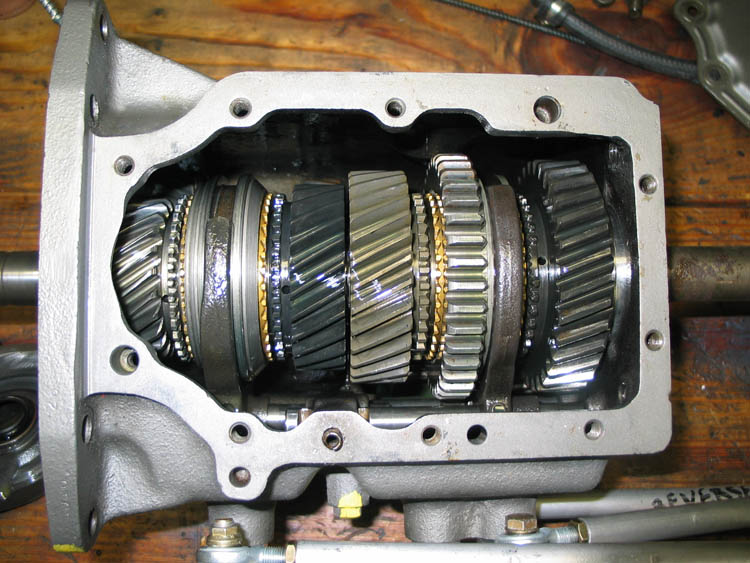
I also found the following foreign matter inside the tail shaft!
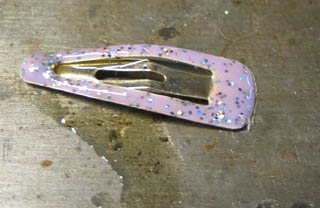
Of course I think I know who to blame. The transmission had been sitting in my office all the time Audrey was an infant and toddler. The open hole of the speedo cable was evidently too tempting. I'm going to have to check my 427 side oiler block too, it was used on many occasions as a castle / fortress for army men by Evan.
I put the tranny back together and got it back in the car just as Wendi came home with the kids.
I also narrowly avoided starting a "Restore a Mustang for Profit" project Sunday. It seemed like such a good idea in the middle of the night saturday night! But in the end I decided I have too many other projects to finish first and no room. Here is the ebay auction for the car, it's very rough but has a lot of potential if you did major body work to it. Should be a $25K car when finished. Originally maroon in color I probably would have restored it as built and sold it. It would have been fun... sniff... sometimes it's tough having to act like a grown up.
'67 Big Block 4 Speed Mustang on Ebay
November 14, 2004
Yesterday I spent some serious time tuning and test driving the car around the neighborhood. Still kind of a rough idle but maybe that is due to the cam. Idle vacuum is 5-6, I could probably swap back to a 4.5 power valve, the 3.5 is in there now. Timing is set at 20 initial with 38 total at 3000 rpm (MSD one heavy silver spring and one light silver spring, black limit bushing). Water temp is staying about 190.
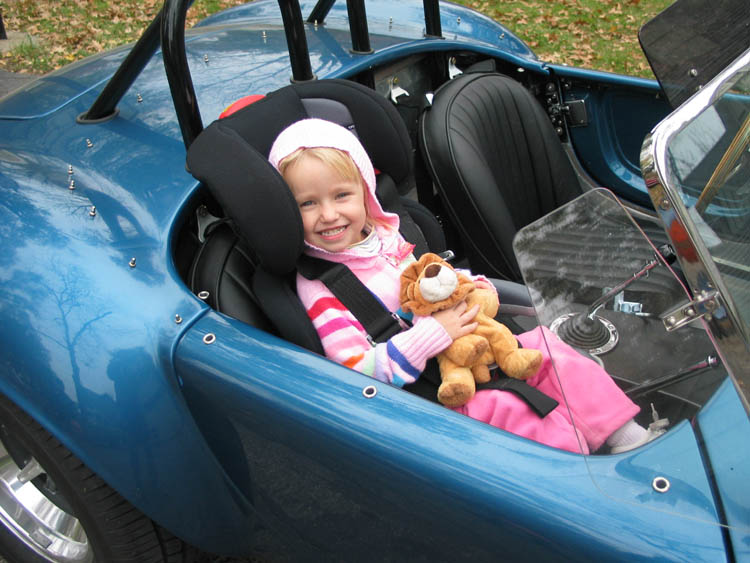
Today I put in all the seat belts in so I can give Audrey a ride for her birthday, she is the only family member who hasn't ridden in the car yet. There still is a small oil leak from the back of the engine. Not really bad, but I'd want to get it taken care of before any track time. When it's ready for it's next oil change I'll replace the pan gaskets and see if that helps, if that doesn't cure it then I'll probably have to pull the engine and look at the rear main seal and plugs on the back of the block. Luckily it only takes a couple of hours to pull the motor out of a cobra :).
Gluing in the carpet and undercoating inside the fenders are the last remaining projects to finish the car.
November 20, 2004
A nice day to work on old cars. Temperature was perfect and things worked well today. On Friday I discovered that my wiper motor really does work, must have been a bad connection before. So this morning I got up early and installed it. That was a significant project since I had to remove the dash to adjust the cable runs etc. I also rerouted the speedo cable and hooked up the heater motor. Took the cobra for a little spin, just to make sure I had the steering wheel in the right position. It's really running pretty good. I haven't really gotten on it yet but it feels strong.
I also worked on the pickup a little. I took the passenger door off and disassembled it, mostly as a learning exercise. I have 2 rust free doors that should be complete, but now I know how they come apart so hopefully I won't mess anything up.
Then I worked on the Galaxie for a little bit. A fellow in Florida bought the clutch linkage and pedal and we traded brake pedals so I swapped them. Tightened the fan belt and checked the fluids.
Then I worked on the Bronco. I'm getting ready to sell it and I gave it a quick tune of the carburetor and fixed a rear brake that was grabbing. The new bumper that I bought after the wreck had started to show some surface rust. I had heard that if you dip tin foil in coke it really cleans rust off of chrome. I was skeptical but I tried it and it REALLY worked well. That's about it, a rich full day of wrenching.
November 30, 2004
Yesterday I got the tail pipes back from ERA and they fit much better. I installed the right side and everything fit great, I just had to drill one hole in the bracket that mounts the rear suspension cage. To drill that hole I had to buy a right angle drill and cut a drill bit in half, but after all that it was pretty easy. All I need to do now is get some thin rubber bushings to keep vibration down.
December 7, 2004
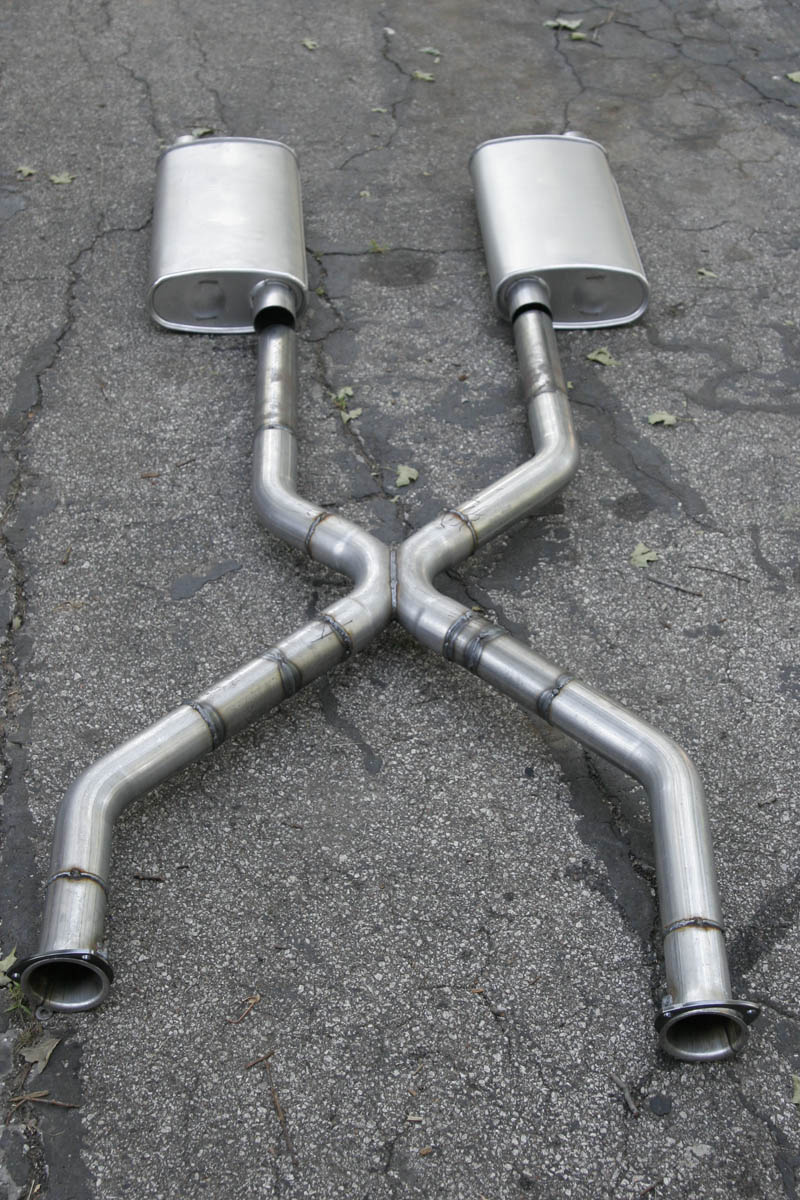
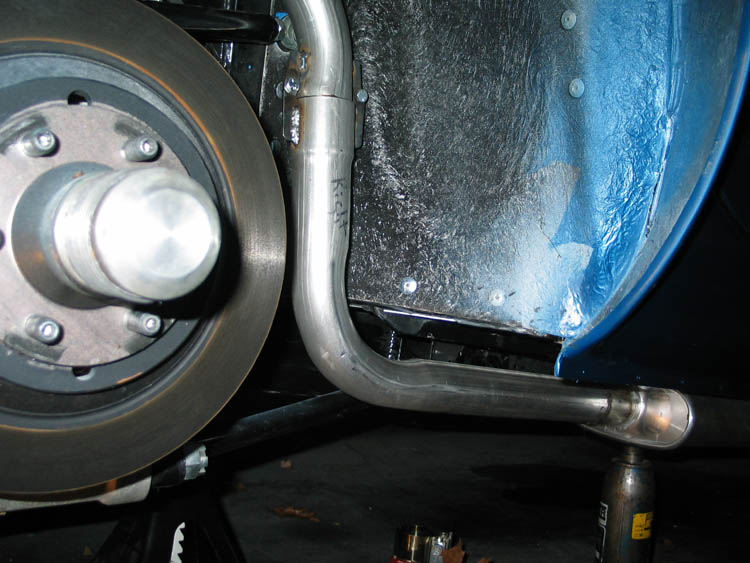
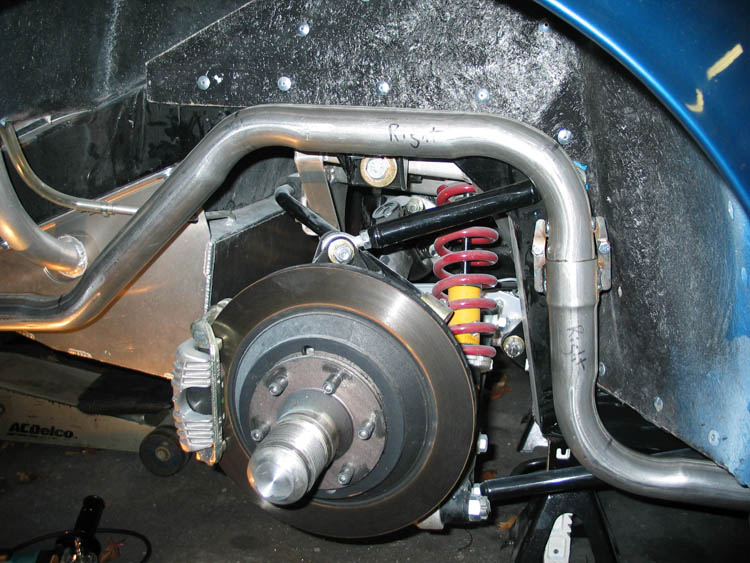
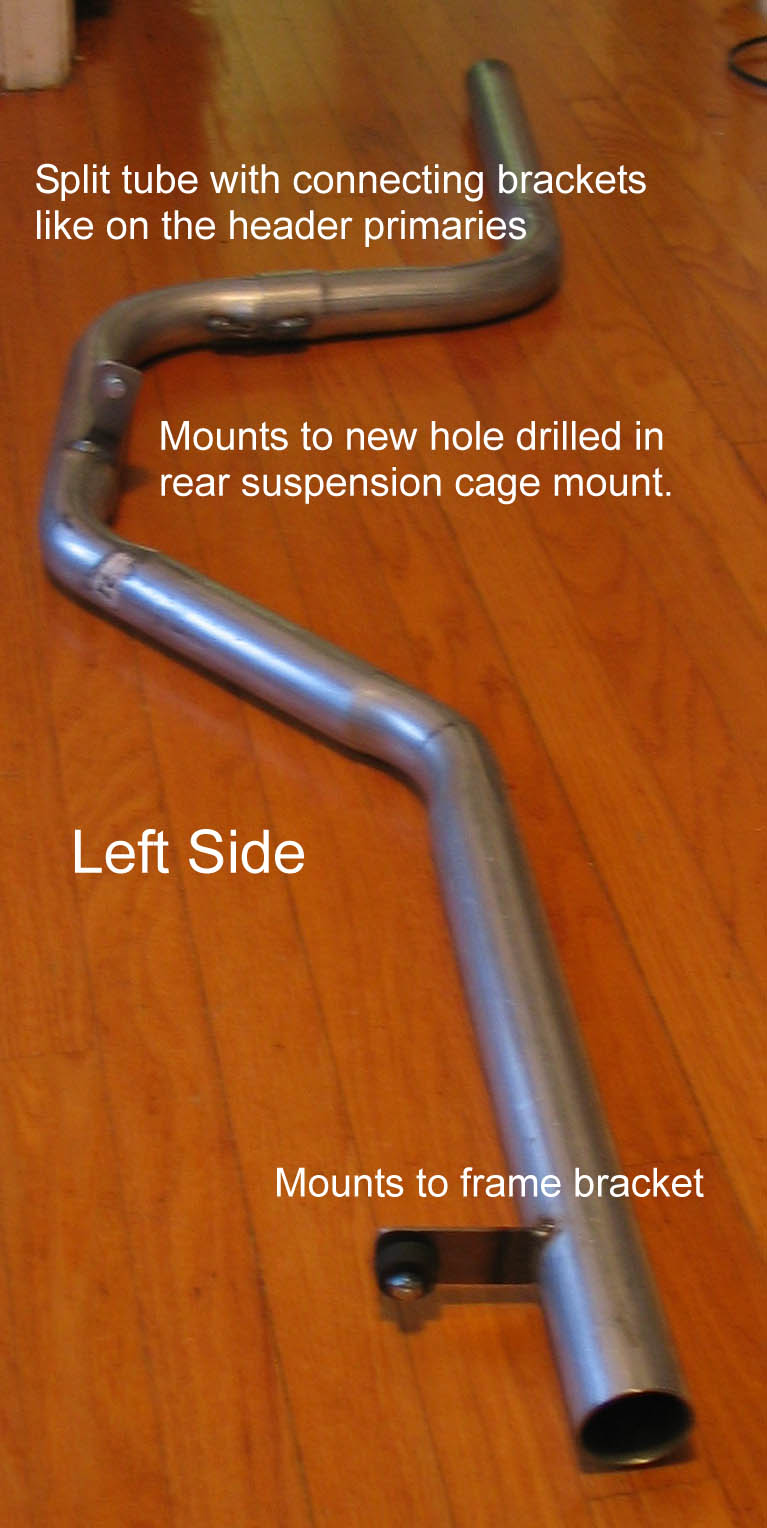
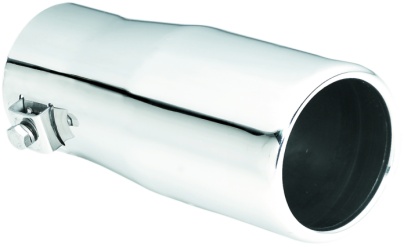
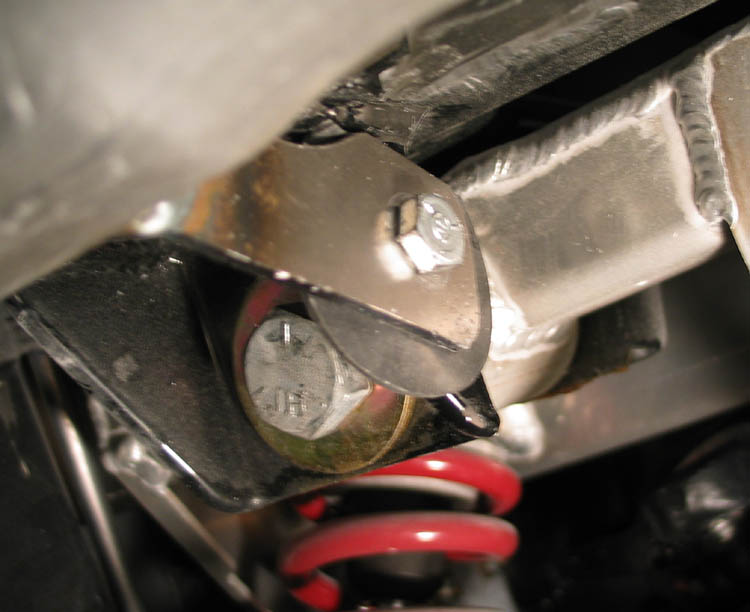
I finished putting the right side tailpipe on this morning. It's ... okay ... I'm still not real happy with it. ERA did work on it and made it much better, but they also charged me for it. I honestly expected the pipes to at least fit this good without paying extra. It sort of reminds me of the phrase "The beatings will continue until moral improves". My major gripes now are that I still had to trim the body slightly for clearance and the final section of the tail pipe is not parallel with the ground. I think I'll buy some shorter tips so that the angle is less noticeable. Don't get me wrong, there are some really talented craftsmen that work at ERA, and this is absolutely the only part of the car I can complain about. But for anyone wanting to build an undercar exhaust for their ERA here is what I would recommend. Buy just the headers from ERA and have someone locally do the rest, preferably in stainless and mandrel bent. Below is a picture you can use for the fabrication, if I would have had a picture like this, I could have avoided sending the pipes back and the resulting upcharge.

December 9, 2004
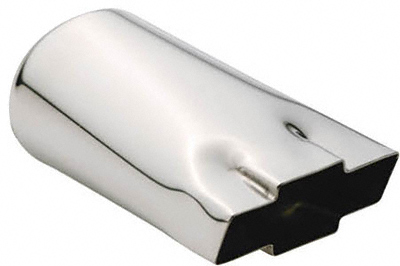
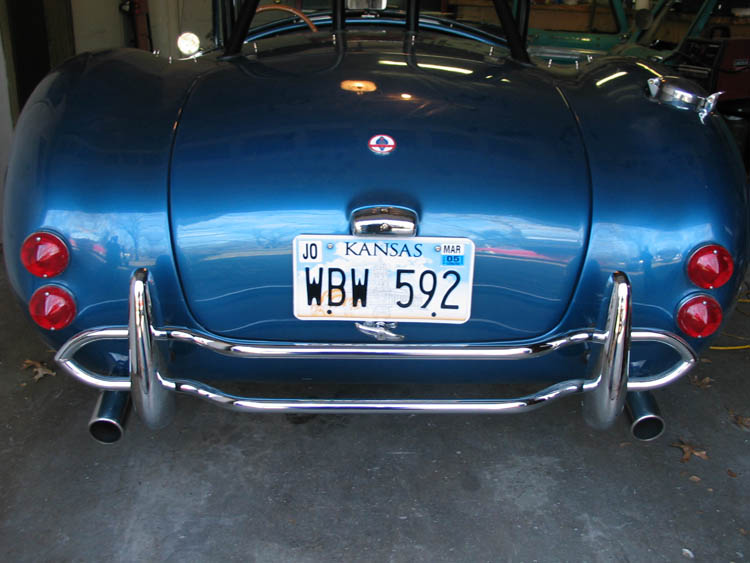
I installed the left side tail pipe this morning and it went pretty fast. I've calmed down a little regarding the tail pipes. I think I'm about 50/50 disappointed with the angle and disappointed that ERA expected me to pay for what they did. To their credit they did what I asked them to, they made it so the pipes cleared the body (almost) and engineered the hangers. I should have specifically said I didn't want them angled toward the ground like a '74 Chevy Monte Carlo! What was I thinking? I ordered some 3" shorter tips to hopefully hide the angle a little.
I ordered these:
But maybe I should have gotten these to complete the Monte Carlo theme?
At least they are symmetrical and the tires clear. You certainly could not get larger pipes in there. I wonder how much mandrel bent corners would help flow?
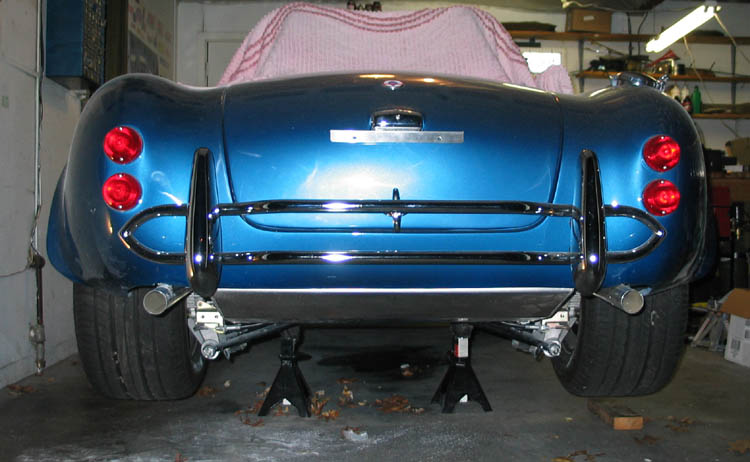
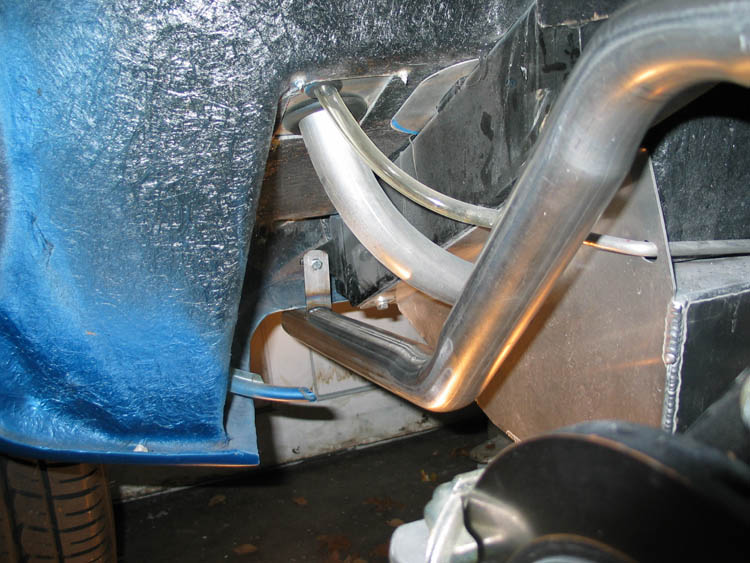
Here are a couple more shots to help would be fabricators build an undercar exhaust for an ERA.

December 23, 2004
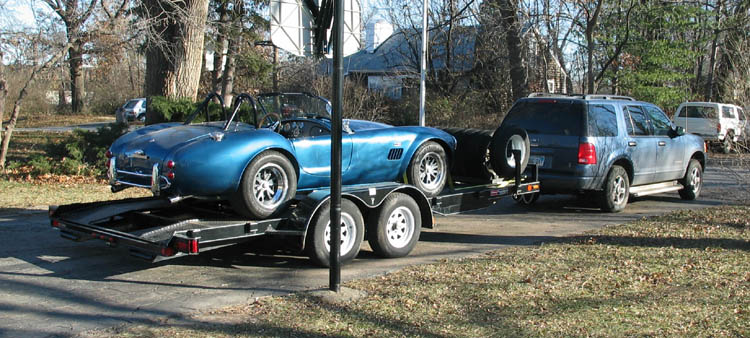
It's Legal!!! We spent the morning at various highway patrol and department of motor vehicle departments, gave them a bunch of $$$ (sales tax) and brought home a plate. It all went pretty smoothly. If you are trying hard to figure out the meaning of our custom license plate, keep work on it and let us know okay? Actually I had my heart set on COBRANDT but you only get 7 letters in Kansas. So I haven't moved on and thought up something else. Wendi says it Wendi Brandt is Wonderful, which I tend to agree with. Thanks to long time bud Jeff Lacina for letting us use his trailer.
Here are the details of the process to help anyone else registering a cobra in Kansas.
Get your insurance lined up. For the VIN I told them ERA 665. You'll need to get a proof of insurance card from them.
Gather your documentation, you'll need a notarized bill of sale for the engine and transmission plus all receipts for parts, the kit etc. This is what they use to decide how much sales tax to charge you.
Fill in your data plate. To the plate I added ERA ahead of the 665 to match what was riveted to the frame. I also added the date of manufacture which was the day I registered it. It's best to have this riveted in before the inspector sees your car. For my VIN they used ERA 665 and registered it as a 2004 Component Vehicle.
Trailer your car to a Kansas Highway Patrol vehicle inspection station. Mine is in Olathe. I think there are designated ones that handle special circumstances like component vehicles so call your DMV and ask where to take it. Bring all your documentation including the receipts and your certificate of origin. The inspector looked at the data plate and frame tag in the car on the trailer and that was it. I gave them $10 and got an inspection document.
At this point you are done with the car, we took it home and unloaded it. Then you take your pile of papers to the DMV. The first step there was the assessors office which added up all my receipts but I think just assigned a code that would determine my yearly registration fee and added a piece of paper to my pile. Then on to the actual clerk who had to add up all the receipts again, this time only adding up the parts and leaving off the labor. That figure was used to charge us sales tax. We gave them the certificate of origin and a check. In return we got a plate, a registration receipt and a promise to send the title in 8 weeks.
January 1, 2005
The weather here has been wonderful. In the 60s the last couple of days so I've been taking a few short drives in the cobra. It is proving reliable and trouble free. On Tuesday we stopped by the DMV to request a personalized plate. Wendi came up with "RUNNOFT" which is a reference to the movie "O' Brother Where Art Thou". But sadly someone from Prairie Village already has it. Still thinking about other ones, nothing really gets the nod yet.
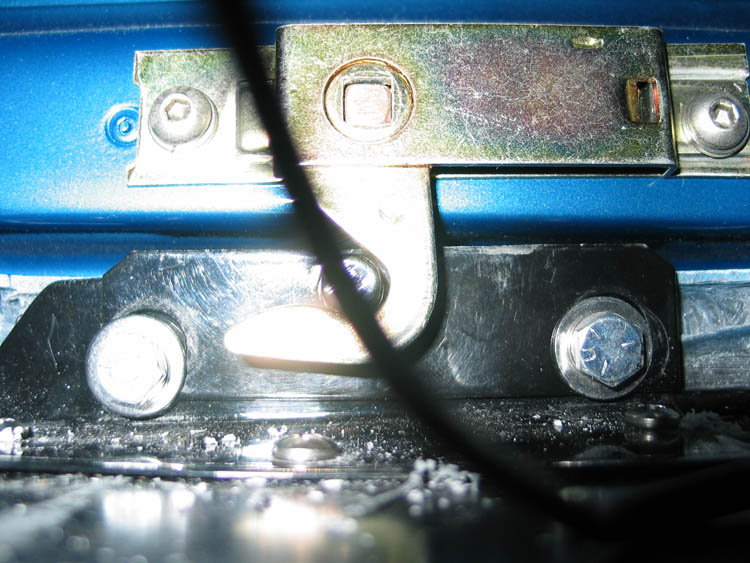
I did solve one nagging problem, the trunk latch wasn't working. I had thought it worked when the car was delivered so I adjusted the heck out of it and didn't get any improvement. I posted about the problem on Club Cobra and while some suggestions involved midgets and cutting holes in the trunk for my head, one guy suggested using my digital camera on a timer to take pictures of the alignment. Brilliant! That worked great and I found that in fact the bracket was way off and had to redrill the holes to mount it in a new location. Now it works great, here is a picture of the final result using the digital camera on a timer.
January 13, 2005
Not much has happened on the cobra, it turned cold here. I did get the dead pedal mounted, which is a little clip that mounts to the side of the footbox to give your foot a place to reset when it's not on the clutch. I also received the car cover to keep the dust off of it. I'm still sort of looking at personalized license plates but haven't gotten excited about anything since RUNNOFT was taken. E-mail me with votes or other ideas! Here are some possibilities but nothing great yet.
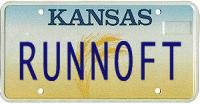 (taken)
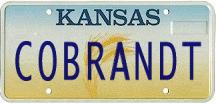 (too long)

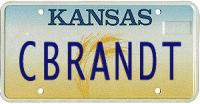 (maybe put a
little O sticker between the C and the B?)
(maybe put a
little O sticker between the C and the B?)