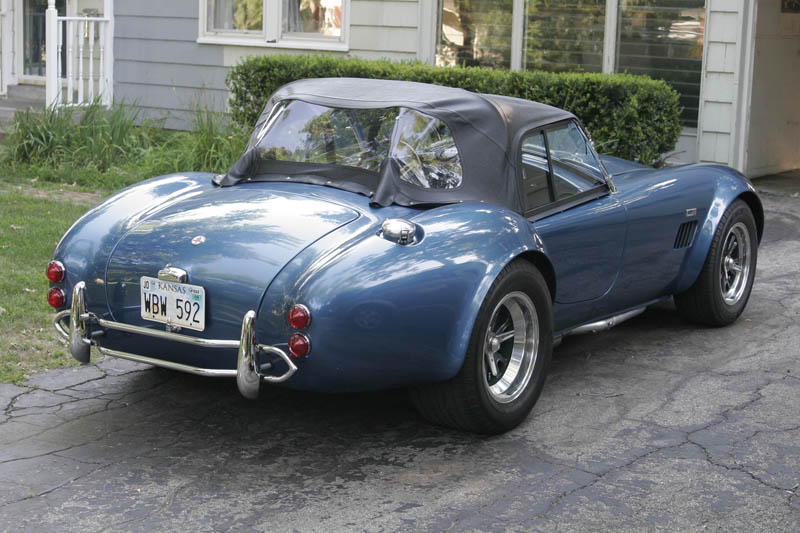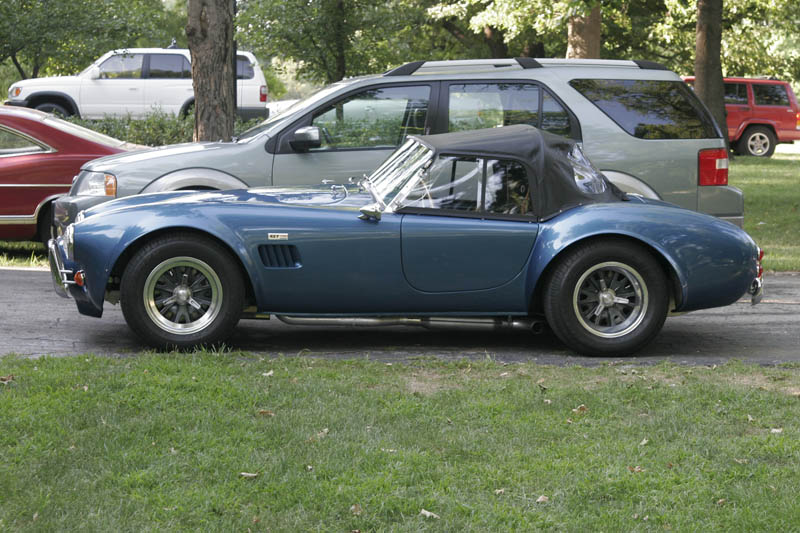
Living with the Cobra
I've decided that this stage is really beyond "Final Assembly". It has more to do with the day to day living with and use of the cobra. So I've started this section and moved the last entry over from "Final Assembly".
February 26, 2005
Earlier this month I drove the Cobra to it's first Mid-America Cobra Club meeting. It was cold out but I was of course anxious to show off the car. We stopped next door for breakfast before the meeting and when I went out to start it, it was REALLY hard to start. I thought I flooded it and it only started by flooring it. It died once and then ran okay while I moved it to the meeting location. Same issue starting up to leave and when giving a couple rides later that day.
The next Saturday I investigated and discovered for some reason when warm I can get gas shooting out of the front bowl vent. That's why it would die after startup. Kind of alarming, I haven't driven it since. Today I hope to try a few things. The current list of theories are:
a) Too much fuel pressure. Not typical of a mechanical pump (Carter). I have a fuel pressure gauge but it seems to read inconsistently. The tech at Holley recommended installing a regulator set at no more than 5.5 psi. I bought a new fuel pressure gauge and a regulator which I will try today.
b) Winter Fuel Problems. I filled up with Amoco Ultra on my way to the meeting. I have heard that there is a higher butane in the fuel formulation for winter than summer. Some people have experienced fuel boil in Holley's just in the winter. Not sure if I think that's the issue or not. It would explain the hard starting when warm I guess and the geyser of fuel. I guess we'll see.
March 5, 2005
I've made some progress with the carburetor but the geyser of fuel still remains. Yesterday I had a "what a day" experience with it.
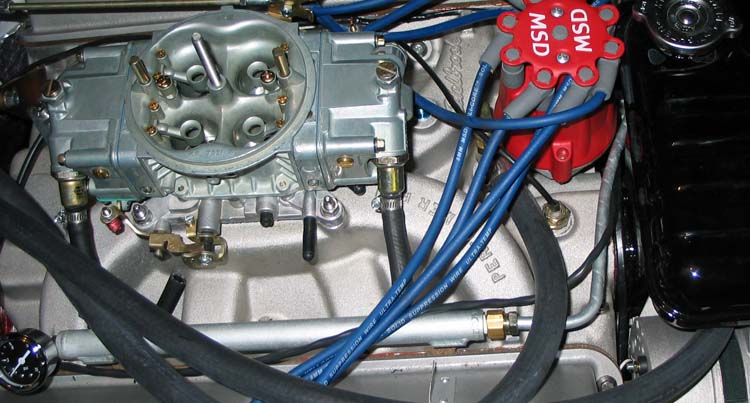
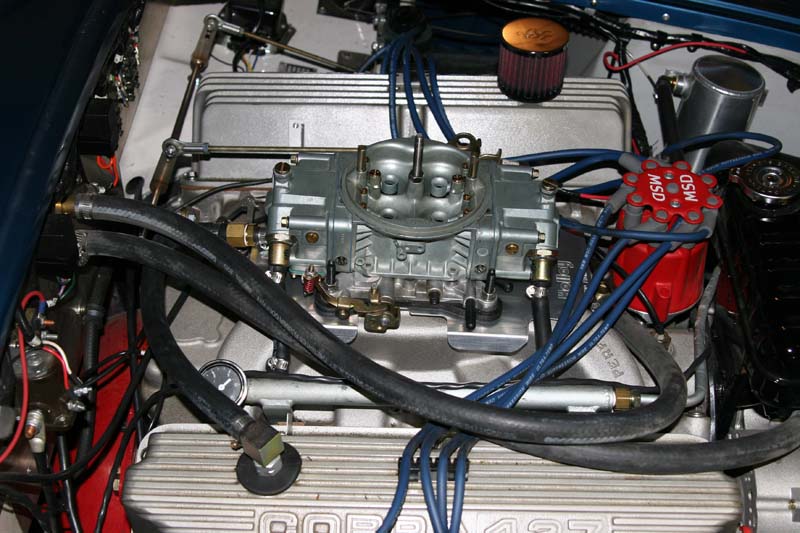
Backing up to the 26th, I spent some time that day working on the carburetor. First of all I installed the new fuel pressure gauge and it confirmed that the fuel pressure is not the issue. I've since heard of oil filled gauges giving bogus readings so that explains the sometimes high readings I was getting from the old gauge. This new gauge is not oil filed and while the needle does waver constantly it measures right at 6psi all the time. So I didn't install the regulator for now. Also with the 6.5 powervalve back in there it seemed to be running even worse than ever, after changing the timing, idle vacuum was down around 5 or 6. I decided to back off some of the initial timing from 20 to 15. I also did a test of total timing and found that something is wrong with the distributor, it was supposed to be limited to 18 degrees of mechanical advance and it appears to be allowing 27. And a test of warm start had the geyser behavior again.
So I ordered a Holley trick kit (rebuild kit) and a Secondary Adjusting Lever Kit (Holley part 26-137) that allows you to adjust the secondary idle from above, which I need to do to regain my idle transfer slot on the primaries. The parts came on Thursday and I took the carburetor apart and blew out all the passages etc. Everything looked good but it was a useful process. I hadn't realized that I have 2 powervalves, I had just changed the primary one before. So I put a 4.5 in the primary and a 3.5 (all I had) in the secondary. I think that helped the loading up at idle problem somewhat.
Yesterday over lunch I had pretty good luck tuning and really had it running better than ever before, it still seems rich to me though. Jetting changes are probably next. I was pretty happy at that point but decided to make one more run around the block to be sure everything was good. It was in the 60s so I wanted to go get Duncan from school in the Cobra which I've told him I'd try to do each Friday. Well I get to the end of my street and at a stop sign it dies with the geyser problem again. I push it into a neighbors driveway and decide to let it cool off. It was at the end of my lunch hour so I went back to work and come back down a half hour later. Still no luck with the geyser problem so I decide maybe there is a problem with the needle and seat. I theorized that I could count the turns removing the old needle and seat and put the new one in at close enough to the right position to drive it home. That turned out to not be the case, and I had a much bigger geyser problem, like full flow out the bowl vent. So I went back to the house, got paper towels to soak up the now deep puddles of gas on the intake. I decided to bring down another carburetor because I had this one so messed up at that point. I used one of the 450s off my dual quad intake that I had previously run on the 312 in Wendi's Wagon so I knew it was fairly well adjusted and should run. Because it is a single inlet carb I had to block off one of holes in the fuel log with a bolt clamped in the hose and run a longer fuel line to the other side. Other than that it was a pretty quick swap. It started and after a little fiddling I drove the car home.
At this point I think I have to assume I have a winter fuel or fuel system heat problem that is causing fuel to boil in the bowl. If you read this article http://eps-hane.com/techtips5.html and follow this thread http://www.clubcobra.com/forums/showthread.php?s=&threadid=60139&highlight=winter+fuel+problems it's almost exactly what I'm experiencing. These guys are at higher elevations but it sure sounds like the same issue.
So after work today Duncan and I went and bought 5 gallons of 100 octane race fuel to mix with the half a talk of (winter) ultra in the car. At $4.70 a gallon I won't want to use this all the time but it seemed like it would be worth a try. I adjusted the float level on the 750 Holley slightly low and put it back on. We drove it around the neighborhood without problems and had a little more success with a hot start test, no geyser.
I'm not all that confident in the winter fuel theory, I think there must be something in the way I did the fuel system that is making the heat problem worse. I was going for an original look but maybe I need to change out some pieces.
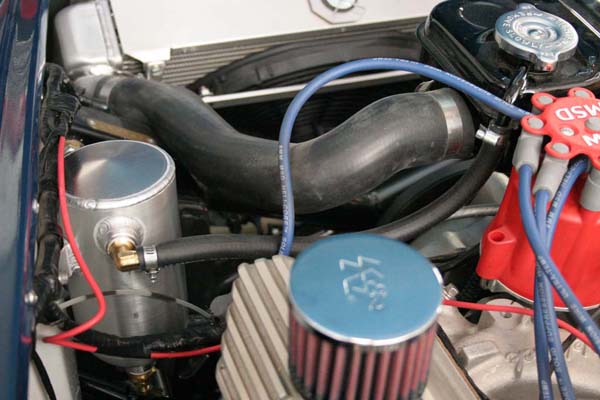
Here is a rundown of what is there. Starting at the tank there is a 3/8" rubber line that goes to a 3/8" hard line on the frame. I have a steel canister filter in that rubber line. Then there is a short 3/8" rubber line that goes from the frame hard line to the Carter mechanical fuel pump on the engine. There is a 3/8" hard line that runs from the pump to the Kirkham fuel log on the intake. From the fuel log there are 5/16" hoses that go to dual fuel filters that screw into the Holley bowl fittings. I probably overdid it on filtering although I don't know if that would contribute to this problem. None of it is insolated which certainly could be an issue.
Some ideas to keep things cool.
Replace the hard line from the pump to the fuel log with steel braided hose.
Install a "turkey pan" and hood scoop, with the theory being the turkey pan will isolate the carb from engine heat. I'm not real excited about it because I like the look of no hood scoop.
Install an insulator of some kind under the carb. It can't be any thicker than a gasket or I'll have hood clearance issues.
Change to a different air cleaner, the current one with it's drop down design undoubtedly traps heat around the carb.
Any other ideas? E-mail me!
March 6, 2005
Did some testing today and it went well. I think the race fuel helped. Tonight we drove it about 20 miles with Wendi following in the Explorer. It didn't stall. Then we waited 20 minutes and tried the warm start and it started right up. Water temp rose to 200 at one point but no boil over. Hopefully if I can keep good gas in it we won't have the problem again. We'll see.
March 13, 2005
Knock on wood, I think I've got the cobra running better than it ever has. With some really good advice from a couple of people on the internet (you know who you are, thanks again!) I made some significant improvements in both the idle quality and how it runs.
I had been having trouble with the distributor, the mechanical advance was supposed to be limited to adding 18 degrees of advance and it was adding much more. I pulled the MSD distributor and found the required bushing stuck to the pickup magnet instead of bolted in it's proper place! I won't try to install these with the distributor in the car ever again. That fixed I was able to set it back to 20 degrees initial and 38 total advance. I also changed to 2 blue springs which will bring in all the advance at 2500 rpm.
On the carburetor I was advised that the idle setting of the primaries and secondaries should more or less match. And also advised that setting the idle with the vacuum gauge would be frustrating (and it was) with the amount of overlap and narrow LSA off my cam. I was also advised that trying to get this cam to idle below 1000 rpm is expecting too much.
Armed with this knowledge I evened out the idle between the front and back (this is so much easier with the secondary idle screw Holley Part 26-137) and started the idle mixture screws at 1 turn. I set the idle around 1000 rpm and went around the carb a couple times adjusting mixture by ear. It now idles actually fairly smooth and throttle response is pretty crisp.
I think I'll live with these settings for a few days and see how it goes.
March 17, 2005
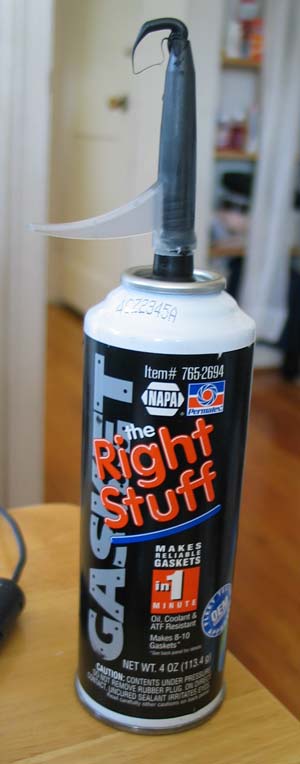
Well the cobra seems to be running pretty well right now. Last night I replaced the oil pan gaskets in hopes of fixing the oil leak and changed the oil and filter. The engine now has 135 miles on it, I'll change the oil again at 1000 miles and then go to 3000 mile intervals. I tried something new when doing the gaskets that I really like, it's "The Right Stuff" gasket goo from Napa. I had a lot to do because with the windage tray there are 2 pan gaskets and I wanted to run a small bead on both sides of each. The aerosol spray thing was so handy you wouldn't believe it. It kind of reminds you of that spray cheeze whiz :), you know what I'm talking about, come on admit it, you've sprayed it directly in your mouth a time or two!
The next project, which also yielded a hesitant product recommendation, was working on the squeaky brakes. Ever since new the brakes have squeaked really bad on the cobra. It sounded like a garbage truck. So after getting lots of advice I decided to try some different products to see if something worked. The first product I tried "NAPA CRC Disk Brake Quiet", used as directed, cleared up 95% of the squeak. The squeak is still there but not that noticeable. If it gets worse I'll try one of the other ideas.
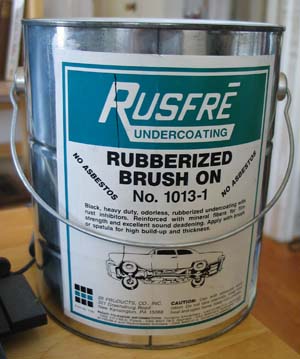
Next project is to undercoat the inner fenders. I wanted something brushable and this stuff called Rusfre' has been recommended by a few people so we'll give it a go.

March 18, 2005
I think I'll need to withdraw my endorsement for Disk Brake Quiet. The noise is getting worse the more I drive it, so while it worked at first it doesn't last. I have sent an e-mail to Sierra that made the brakes to see if they have some kind of antisqueak shim. I'm also waiting to hear from another ERA owner who is getting some shims from Wilwood that should also fit my car.
The Rusfre' did work pretty well. I painted it on this morning and it worked pretty good. It's thick and takes a while to paint on but hangs well, only had a couple of drips. I started out with an old 2" brush and finished around the suspension with a 1/2" brush.
March 20, 2005
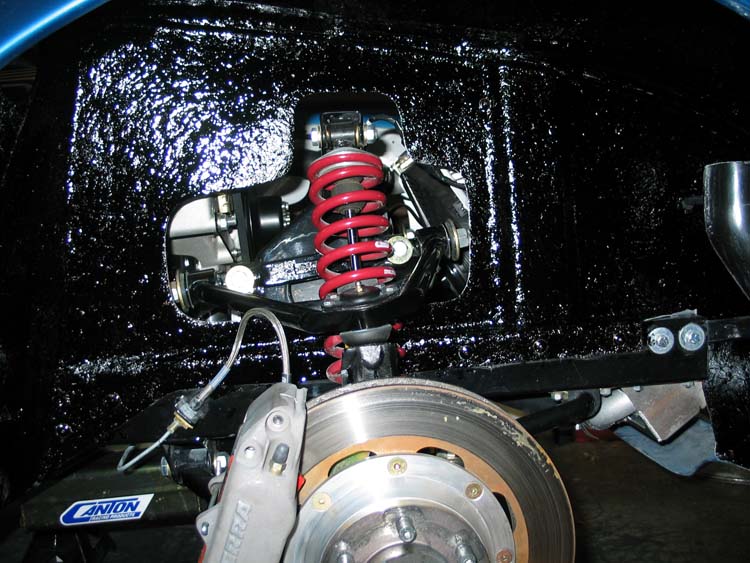
This morning I finished all the undercoating. On the rear I decided to stay away from the exhaust so there is some bare fiberglass showing, but not visible with the wheel on. I used less than 1/2 gallon of the Rusfre' stuff. So far it looks nice, the first fender I did 48 hours ago is no longer tacky to the touch. Ask me again in a year how it looks.
The really good news I have to report is the oil leak was fixed by replacing the pan gaskets! That's cool because I didn't really want to have to pull the motor to check the oil galley plugs on the back of the motor or the rear main seal.
April 12, 2005
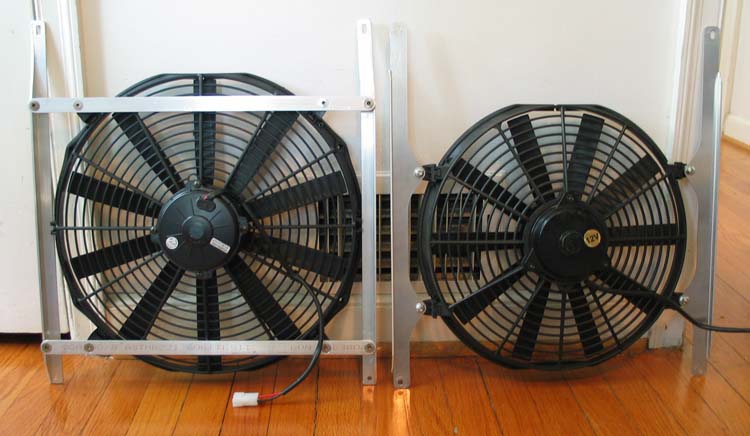
My buddy Mark and I took the cobra on the first Mid-America Cobra Club cruise of the season last weekend. It went okay but a few glitch list items have been added. Most seriously, stopped in traffic the engine coolant temp rose to 245 degrees. It was fine once we got moving so I surmise the big problem is the size of the standard fan. Below is the current glitch list with proposed remedies (which I hope to implement this week).
Engine overheats while idling - Ordered new larger fan from ERA, reports from other owners with similar problems suggest this will fix it.
Speedometer mis-calibrated - Ordered 7 tooth tailshaft gear and gasket from David Kee. That provided a better combo with the 18 driven gear I have, than switching to the 16 tooth driven gear.
Transmission slips out of 2nd gear when driving downhill (coasting) - Adjust shift linkage for better engagement.
Brakes Squeak - Ordered Wilwood brake shim kit part number 300-8460.
Rear suspension bottoms out on bumps - not sure what to do on this one. Could be shock setting. Ride height (spring preload) appears correct.
My Dead Pedal is way to close to the seat. I'll have to figure out a new spot.
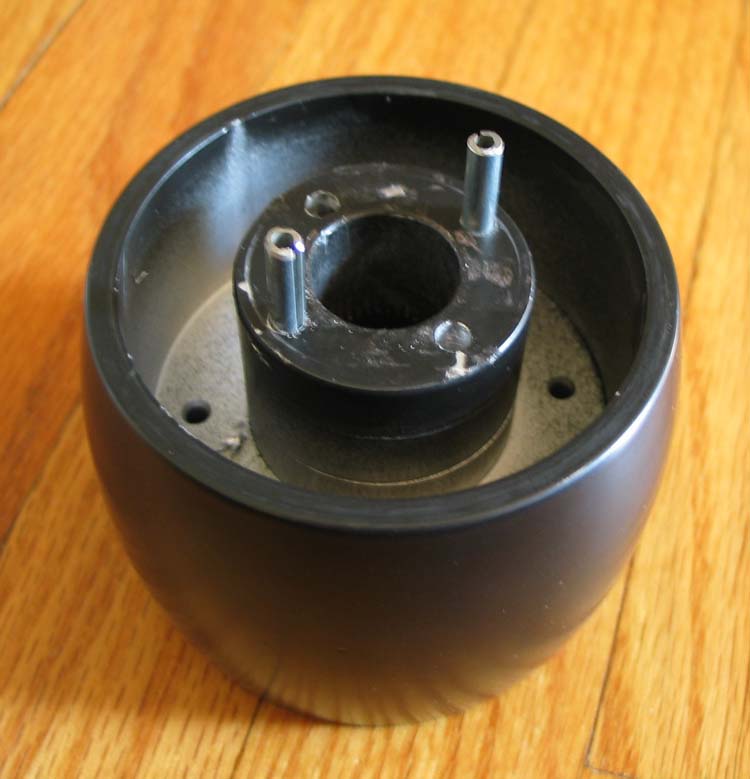
Turn signals don't cancel correctly - I think I need to re-clock the hub to the steering wheel.
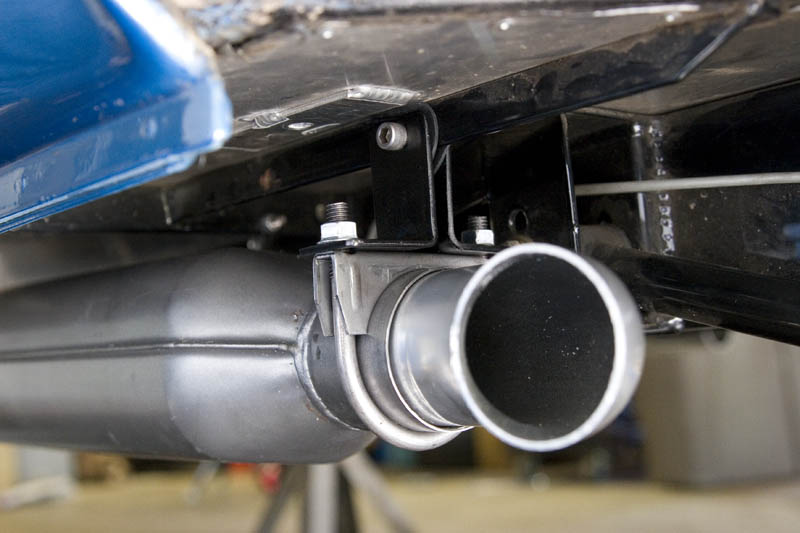
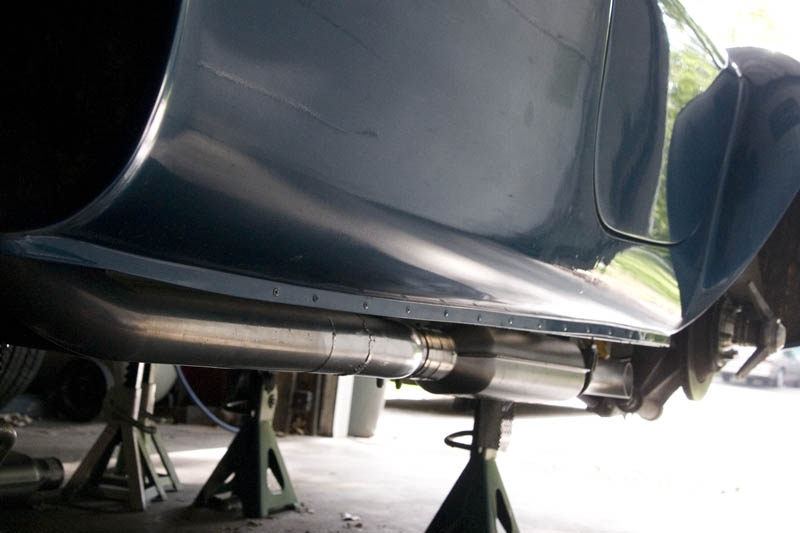
Various minor exhaust leaks - I'll use a pipe expander to try to get a better fit and also muffler cement goo.
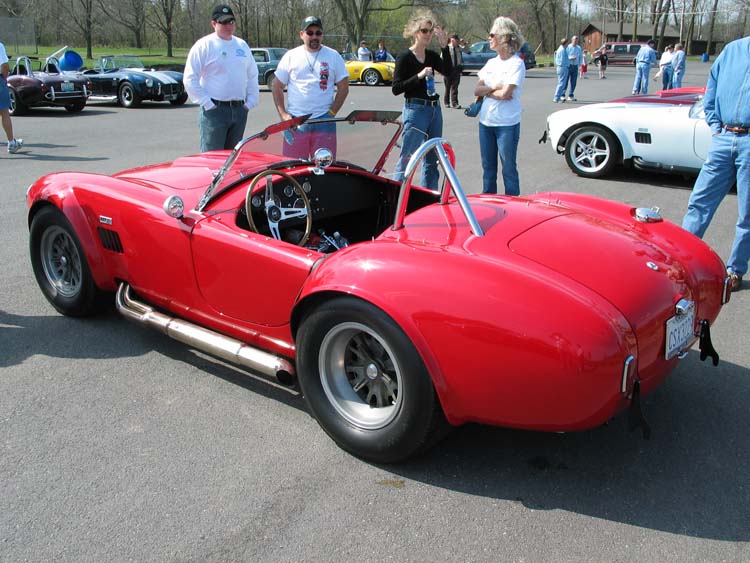
The best part of the cruise was that someone brought out their original 427 car, CSX3229. It was really stunning, you can spot a real car from a mile way. The patina on the wheels was my first clue, but there is something more subtle. They just "sit right" or something.
April 16, 2005
Well, the only parts that showed up this week were the speedo parts from David Kee. And I didn't want to tear into the transmission at the moment because I'm taking the car up to Greenwood Roadway tomorrow!!! I did fix a silly but pretty annoying problem with the turn signals. They never canceled right and I assumed I just needed to rotate the hub relative to the wheel. But you can't do that because the wheel only bolts on one way. So pretty quickly I came to the conclusion that my hub was manufactured wrong. It was 90 degrees off on the pin side and the pins were too close to the center such that they didn't contact one of the canceling cams. I got some new pins and drilled new holes in the hub and now everything works perfect. Here is the hub with the new pin locations.
April 25, 2005
Made lots of progress on the glitch list this weekend. I installed the wilwood brake shims and that almost eliminated the brake squeal issue. I still hear it but it's tolerable, and I can't rule out that it may be coming from the rears. I also put in the new driving speedo gear from David Kee. It turns out you _can_ pull the tailshaft housing with the transmission in the car! I just had to remove the driveshaft, driveshaft safety loop, and the transmission mount adapter. I also adjusted the shift linkage in an attempt to fix the 2nd gear slip out problem. I have my doubts whether that is fixed, I may have to pull the transmission and go through it myself. My ebay purchased "rebuilt" transmission may not have been such a bargain afterall. This week I need to get the tunnel put back in (with some kind of foam seal to keep the engine heat out) and the seats back in. Also on the agenda is adjusting the ride height a bit more skyward. I want to get it all back together to take Wendi on her first cruise night next Saturday.

May 1st, 2005
The cobra is now back together after the last round of fixing. But due to some kind of communication failure with ERA I still haven't received the new bigger fan, so we didn't get to go on the cruise on Saturday. Today I worked on the rear suspension ride height. I discovered the bottoming out on bumps is actually the suspension hitting those darn tail pipes. I may just put dumps back on until I can get them re-made correctly. Adjusting the suspension is a time consuming process. What I want to achieve is the correct ride height as listed in the manual with 2 people and a full tank of gas. So far I've added one turn to each of the rear springs. It appears that 1 turn is approximately 1/8". But one side influences the other and you have to drive the car around the block to settle it to see the actual effect. Enough fooling around for today, we're off to see an all ford car show in Liberty, MO.
May 4th, 2005
Today the new fan arrived and I think we can safely declare success on the overheating issue. The new fan is the "Heavy Duty" optional fan from ERA which is a SPAL 16" 3000 cfm unit replacing the standard 14" one that came with the kit. Duncan and I ran it around town for almost an hour and let it sit and idle for quite a while. Temp rose to no more than 185 in 68 degree ambient air temp. I would think that would be enough to keep it no more than 200 degrees in the warm days of summer, but of course we'll see. We are nicely knocking stuff off the list, I think only items 5, 6 and 8 remain.
May 10th, 2005
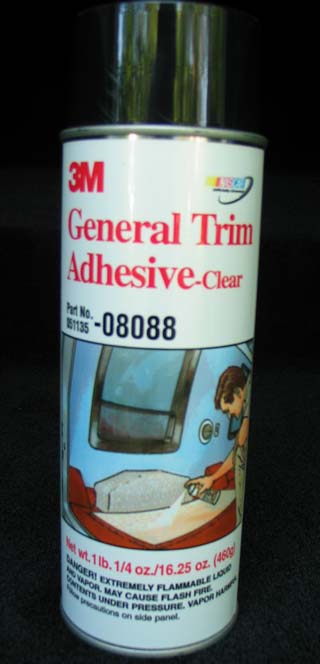
I had a revelation the other day, someone on Club Cobra www.clubcobra.com was asking how long it took to build the car and I realized I had been working on it for 20!! months and it still wasn't finished. So now I'm anxious to get it "finished". Today I glued in the trunk carpeting. This turned out to be actually kinda fun and one of the least problematic processes so far. The carpet pieces (6 of them) fit well and only needed a slight modification because of my 2nd roll bar. I used 3M General Trim Adhesive and it appears to work great. Being in a spray can it was not messy and you had good control. You spray it on both surfaces and let it dry for a minute or two. Then when you put them together they are pretty well stuck, you might have one chance to pull it up and reposition it.

May 25th, 2005
The cobra and I suffered a pretty humbling setback at the cobra club "Dyno Day" last Saturday. The good news is the engine didn't blow up or anything, but the bad news is that it only did 269 HP. I knew it would be down because of the restrictive exhaust, and I figured it was running a little rich. It turns out the exhaust is REALLY restrictive and it was running REALLY rich. I had hoped to be able to make changes between the 3 pulls but this year they required that all 3 pulls be done in one strapping. It was a long day with 21 cars to be dyno'd and by the late afternoon no one was in the mood to watch me fiddle too much with mine. In fact the dyno operator, who had been fiddling with 5.0 EFI stuff all day said my carb was "too messed up to try and fix now".
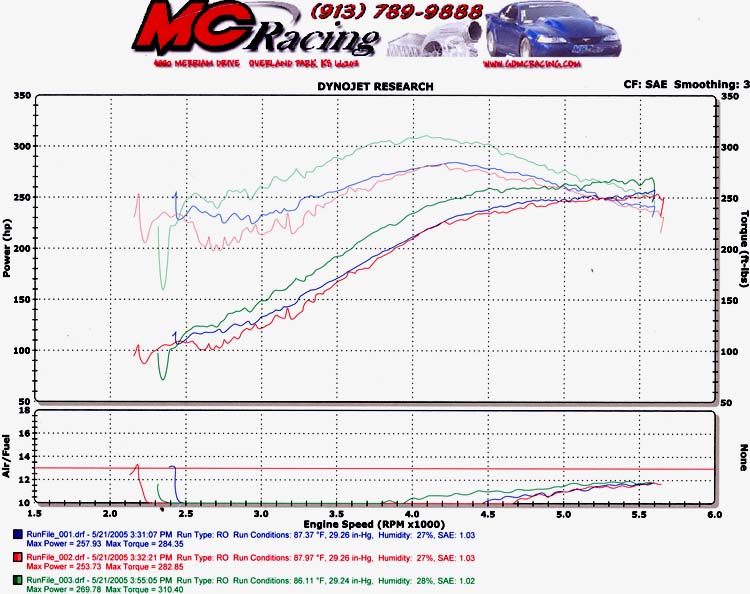
Note the horse power is leveling off but still climbing at the end. I figure that's mostly the exhaust. Also note the air / fuel ratio graph at the bottom, well off the charts in the rich department. I have been told that the restrictive exhaust may be making the carb rich too. I had guessed that the exhaust's biggest problem was the tail pipes but it may in fact be the mufflers. Here is what Walker tech support (they make DynoMax mufflers) had to say. The 17762 is the 2" ones I have now, the 17733 is a 2 1/2" version of the same thing.
"Thank you for your inquiry for Dynomax Exhaust. We appreciate your interest in our products. The 17762 is only good for 164 hp. the 17733 is good for 372 hp. both with 2 1/2 inlets an outlet . That's the only super turbo with those dimensions tail pipe size with that hp. recommend no smaller then 2 1/2 If you have any further questions, please feel free to contact our tech line at the number below."
Long term I want to try and build a 2 1/2" system for the car. I can cut the end of the header off that drops down from 2 1/2" to 2", use the 2 1/2" muffler and either dump after that or fabricate 2 1/2" tail pipes out of mandrel bent tubing. I may need to squish the 2 1/2" pipe into an oval 2" thick near the tire.
I have also jetted the carb down from 73s all around to 70s but haven't tried that out yet. Hopefully it will help. To be honest it really doesn't seem to be running _that_ bad. It doesn't feel like 400 HP though. I was hoping for 300 rear wheel and that doesn't seem that far off if I can get the carb straightened out. I may need some professional help on the carb, we'll see.
May 31th, 2005
I spent some time yesterday trying to figure out why the trans is slipping out of second gear. After some discussions with several people on Club Cobra it was decided that the 2nd gear syncro is most likely bad. So I pulled the transmission out and inspected further on the bench. I decided the 2nd gear engagement section was none too good either. So to fix it right, today I ordered the 1-2 syncro, 2nd gear, gaskets and a complete shift rail kit. That should fix it's wagon. I think the guy that "rebuilt" it before left some marginal parts in.
I also spent some time last week looking at how I might improve my exhaust. My first thought was to cut the reducer off the end of the header and go with 2 1/2" components. That's still probably the best approach but I discovered the 2 1/2" dynomax muffler is about an inch too wide to fit. I'm thinking magnaflow's might fit.
I would get those in a 2 1/2" size and cut off the reducer. I think they will fit. I would either do a dump right after them or build new 2 1/2" mandrel bent tail pipes. Without the offset the tail pipe would have to angle over after the muffler. Also next to the tire I'd probably have to oval the pipes in a press down to 2" thick to maintain what I think is the required 1" clearance. In any case this sounds like a winter project to me. I think I'll have to live with what I've got for the time being.
June 3rd, 2005
I spent a couple hours tonight taking the transmission apart. I was pretty disappointed in some of the parts. The reverse slider gear is all beat up. The 1-2 syncro is definitely bad so that was a good call by those that made it. The thrust washers on the short shafts are pretty beat up, I wonder why they weren't replaced. Anyway, looks like I'll be making another order to David Kee. It's very irritating but at least when I'm done I'll know it's right.
![]()
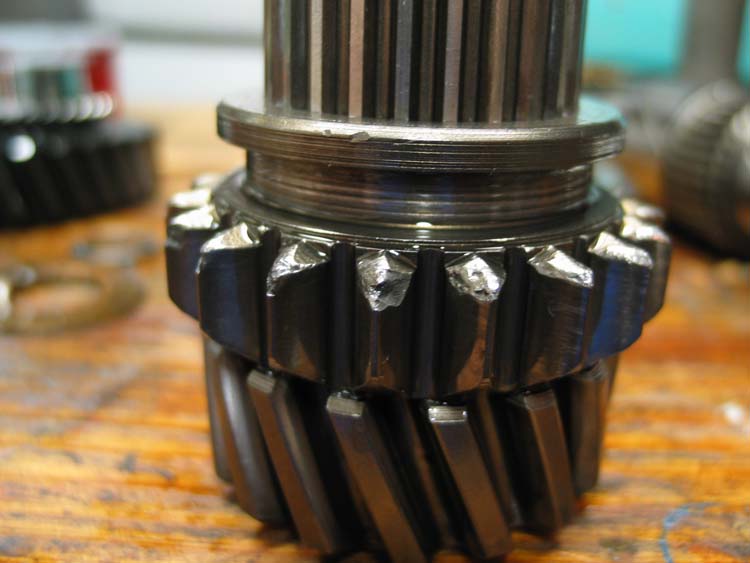
June 10th, 2005
I got all the parts in from David Kee and plan to put the transmission back together this weekend. Here is what $528 worth of Toploader parts look like:

New parts include:
Gaskets
Small Parts Kit which includes snap rings, needle bearings, and thrust washers.
1-2 and 3-4 shift forks
Shift rail and detent kit
1-2 syncronizer
2nd Gear
Reverse Slider Gear
I may have replaced more than I needed to out of inexperience, but I was told to replace whatever looked worn.
June 11th, 2005
Had a good morning. I started putting the transmission back together at about 6:00 and had it reassembled and back in the car by noon! Everything went pretty well, and no unexpected extra parts (we like that).
June 14th, 2005
Well, the test drive on Sunday was not successful. Very difficult shifting 1st and 2nd. I had noticed the blocker ring was sticking onto the new 2nd gear but I had hoped that it would loosen up in grease. I also discovered I messed up the shift rail install. The new shift rail kit is a '65 version and came with 2 hatchet style detents. I didn't know where they went and assumed that the round ones were the same effective length and reused them. Actually they aren't because the hatchet detents go on either side of the interlock pin. Anyway, this morning I pulled the transmission back out, and have all new blocking rings coming from David Kee. Hopefully, the third times a charm. Pushing hard to drive the car on a cruise with Wendi on Saturday.
June 18th, 2005
Do I dare use the "F" word... as in "Finished"? I'd have to say almost. I need to have the top fitted but other than that I feel like I can call the Cobra finished now that all the carpet and trim pieces are in. Wendi and I drove it to a car show here in town tonight and it did great. I'm planning to drive it to Nebraska to visit a friend next weekend so that will be the real test. The only issue was more engine heat in the interior than we'd have liked. Luckily the floor carpet is removable so I can easily add some kind of insulation.
Going back to the transmission project, it is now working well. I haven't tried hard to get it to slip out of 2nd gear but I'm confident that at least is fixed. The shift rail kit I got from David Kee did not work however. When I read their website I got the impression that their shift rail kit could be used in any top loader. Their kit is for a '65 transmission and mine is a '68 (type 3 shift rail setup as shown on their website). When I assembled the transmission with the '65 shift rail kit with the hatchet style detents on either side of the interlock pin, the transmission will not shift into reverse. I tried everything I could think of, my conclusion is that you really can't use this shift rail kit in my case. I'm still waiting to hear back from David Kee. I ended up putting my old shift rails and detents back in.
I also finished the carpet and interior trim. It really looks a lot nicer.
July 2nd, 2005
This week I worked on exhaust leaks. I believe they were messing up my new tool http://www.innovatemotorsports.com/products/lm1.php My initial testing of it showed lean which was inconsistent with the chassis dyno and all the black soot everywhere. I replaced the header gaskets with Felpro 1442. I put preformed band clamps on either side of each muffler, and I put some exhaust goo called "Yale Automotive Iron Reinforced Muffler Cement" in the joints on each tail pipe. All the locations showed evidence of leakage so hopefully I have at least improved it some.
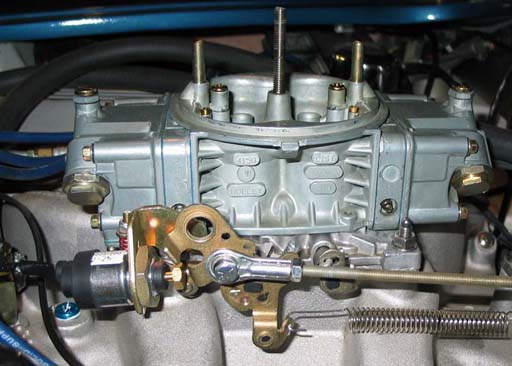
I also installed an anti-dieseling solenoid on the carburetor. This is a little electric solenoid that is energized when the switch is on. It becomes the idle adjustment so that when you shut off the engine the throttle plates close preventing run-on. I have such a high idle with this cam that I needed to do it. Seems to work okay so far. I used holley parts 46-74, 20-47, and 26-57. I had to drill and tap larger two existing holes in the carburetor base plate. (Update: it appears I ordered the wrong bracket. I should have gotten 20-9 instead of 20-47. I don't think I would have had to drill and tap my base place if I had gotten the right one.)
Hopefully now that the exhaust leaks are fixed I can get the LM-1 to work and can do some serious tuning of the carburetor.
September 16th, 2005
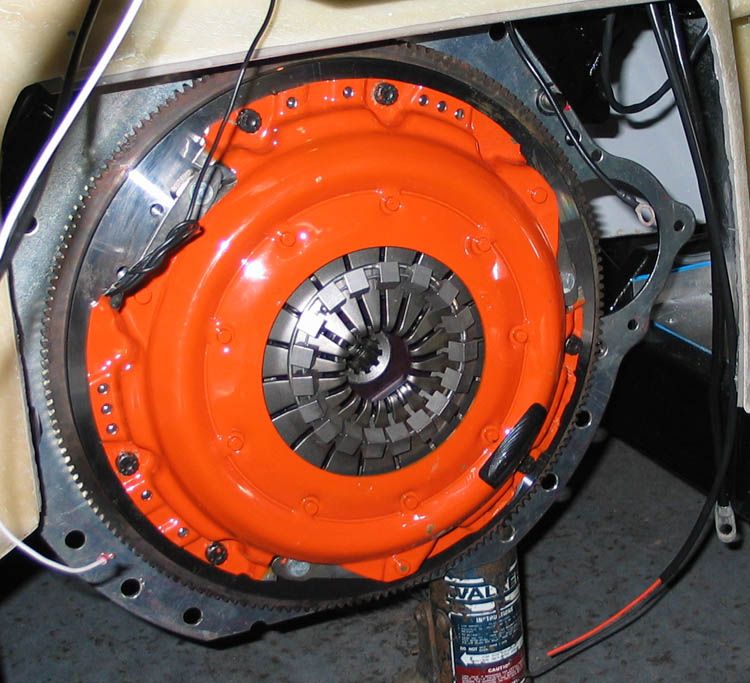
It's been a while since I updated this page. Since then I've done a little carb tuning and been driving the car some. Wendi and I have gone on a couple of driving dates which were really fun. After the last of these I noticed a problem getting worse, the clutch was beginning to drag. I went on to adjust the clutch and bleed the slave cylinder and made no progress. It was so bad when you'd rev it to 4000 in 1st gear (with the clutch in) it would pull ahead like you were feathering the clutch. I scratched my head for a while but then remembered reports I had been hearing of people (mostly with cobras) having trouble shifting with the Centerforce clutch. I check with one guy and he said taking the weights off solved a similar problem for him so I decided to try it. The Centerforce clutch I used is based on a standard clutch to which they add these sliding weights that help clamping at high RPM. My theory being that these weights were also deforming the clutch fingers at idle and higher RPMs and causing the clutch to not disengage as far as it normally would. So I tore it all down and removed the offending weights. It was pretty easy to do, I found I could accomplish it with the clutch and bellhousing still on the motor. I first pried off the outer ring, then cut the inner ring that all the weights were threaded on. The weights then came off easily, infact many of them fell out. You'll want to carefully count and find them all. If I had it to do over, I would have put a towel inside the clutch to keep them out, some fell down in there and were fun to work out. BTW, my clutch had exactly 18 of the little weights. I tested it this morning after I finished up putting the transmission back in, and it is 100% better. I admit I feel a bit scammed by Centerforce at this point. But it is possible that the ERA clutch setup has sort of marginal disengagement in the first place. And ERA doesn't recommend a heavy duty clutch because it's such a light car. I was pleased to fix the problem for free, but I could have gotten by with a standard clutch in the first place.
Below is the clutch as installed showing the weights, and the pile of parts I removed.
October 11th, 2005
Last weekend I took the cobra on it's longest road trip ever. Everything has been working well on it since the clutch mod that I thought it would be a good chance for one last trip before winter. I have a friend in Lincoln, Nebraska that has many collector cars which he tries to at least start each year to keep them in good condition. This year I invited myself up to help, and since he hadn't seen the cobra in person yet it seemed like a good opportunity. Lincoln is about 200 miles from here so it would be a good chance for a test of the car.
I drove up Friday night and it was COLD. High of 56 here that day and a low in the 40s. As you may remember I don't have my top fitted yet. So I put on my winter coat, stocking cap and gloves and headed about 4:00 in the afternoon. Everything worked fine on the way up, I stopped at a rest stop half way there and the warm restart was no problem. Bought gas about 30 miles from Lincoln, gas mileage wasn't stellar, about 10 - 11 mpg. I arrived in town at 7:15 and it was 40 degrees.
We spent Saturday and part of Sunday trying to start cars, we were successful with 6 out of the 12 we tried. Then on Sunday after giving some rides I headed out about 1:00. No issues coming home. It's really a comfortable car to drive (other than the temperature on this trip). I had no issues with the seat, I did sort of get a little cramp in my throttle foot but I'm probably used to cruise on long trips.
When I got back I did notice one tail light was out and the brake lights didn't work. The tail light turned out to be a connector that had separated. To fix the brake lights I replaced the pressure switch on the master cylinder. Not sure why that would have failed, but based on club cobra forum it seems like a fairly common occurrence with ERAs. If you need one go to NAPA and ask for part SL113. Last night I also did the 1000 mile oil change. I've been following a new motor schedule of 1/2 hour, 100 miles, 1000 miles, and every 3000 miles thereafter.
November 19th, 2005
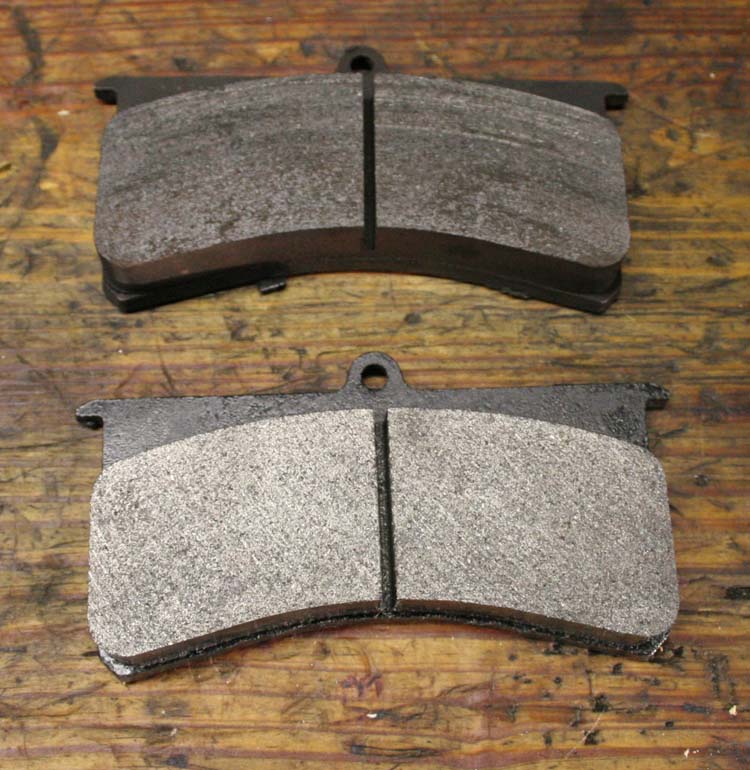
Fixed a long nagging problem today! Since day one the brakes had been squealing more than I wanted. Sort of like a garbage truck. Kind of embarrassing. Anyway several ERA owners on www.clubcobra.com had complained about the same problem and once of them came up with a Hawk High Performance Street pad that solved the problem. The part number is HB101F800 and I got mine from JRMotorSports up in Ankeny, Iowa. You can tell by looking at them they are less aggressive than the ones that came on the car. Originals above, Hawks below. I bedded them in per the instructions and never heard a single squeal out of them. I'll probably switch back to the originals for track events but for the driving I do around town these are ideal.
January 16, 2006
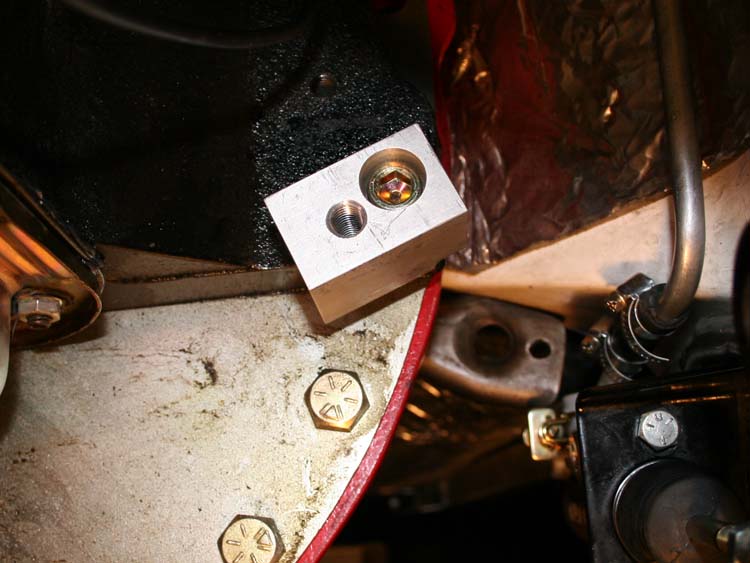
I have noticed a little more trouble with the clutch dragging, especially after it is warmed up. My theory at this point is that the throw on the hydraulic clutch master / slave combination is marginal for the centerforce clutch I am using. The BMW 2002 master / slave that ERA uses both have 3/4" bore. My idea is to replace the master with a Tilton 7/8" bore unit which will give the slave a little more stroke and hopefully fix this problem for good. Since I started the conversion another ERA owner has said he needed to replace his slave (BMW) to solve the same problem. So I may end up doing that too. But I have the new master and am determined to try it.
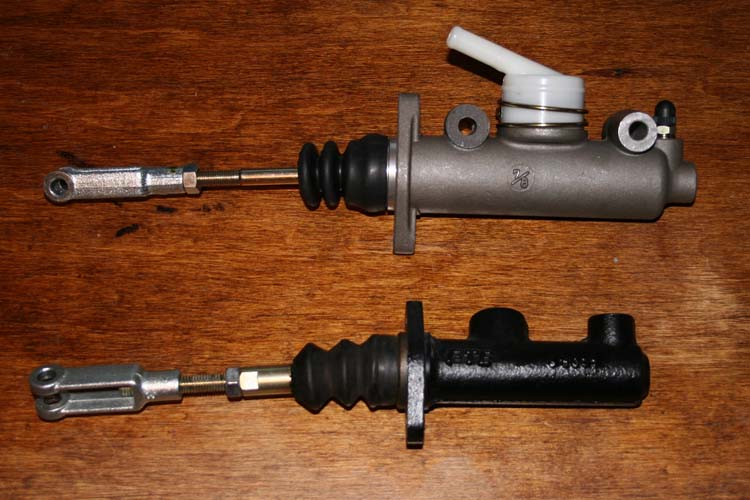
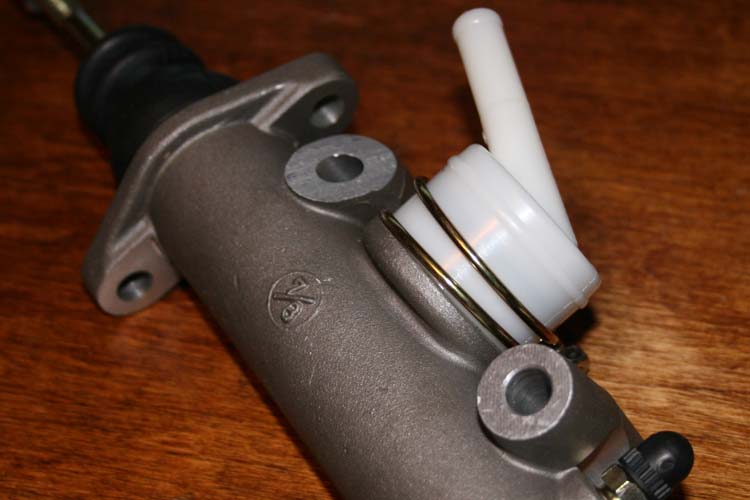
Above is the Tilton Master, below the BMW. It's not a complete bolt in change, I have to rework the remote reservoir line (but this gives me the opportunity to route it further from the exhaust and engine heat) and get a new braided steel line for the master / slave connection. The Tilton also had to be modified to clear the fuel line on the frame by cutting off the unused cross bolt mounting boss.
January 24, 2006
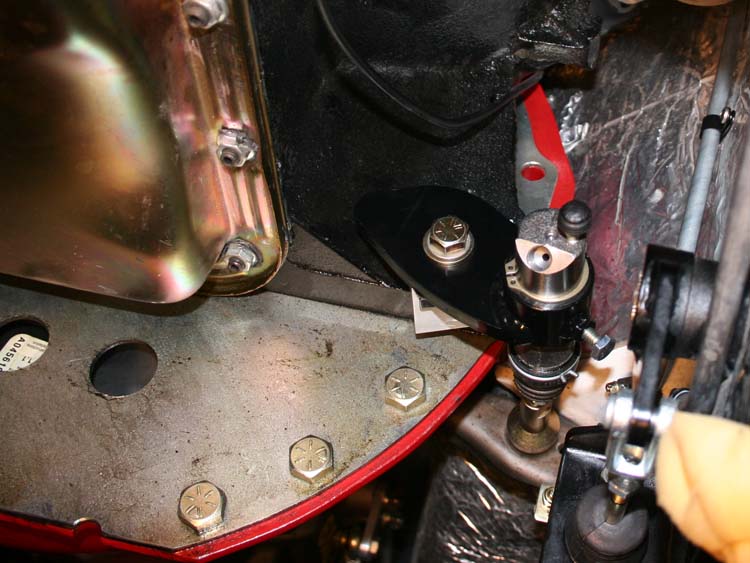
I posted a picture on club cobra of my slave cylinder alignment, and Bob Putnam of ERA replied that I needed the spacer shown here. I got that in and installed it and it definitely helped the alignment. As the page suggested, I needed to grid the lip down and rotate the block slightly for best alignment. So now I am working out the hose and feed line issues and will get those finished soon hopefully. I also got a new slave cylinder. I know this "shotgun technique" at fixing the problem is not very scientific, but I do want it fixed for sure. Here is the part before modification. I ended up grinding about 1/2" of the flange seen at the top so the whole spacer could rotate about 30 degrees.
![]()
March 04, 2006
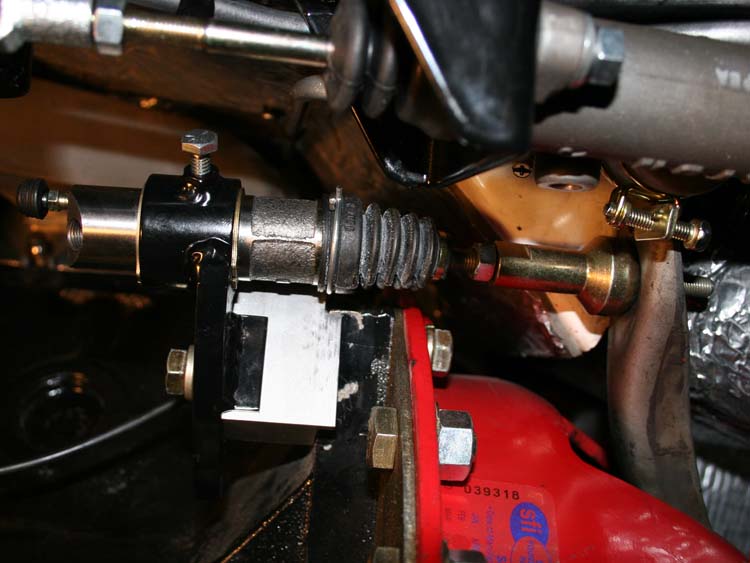
Well, not sure what happened but it took me until today to get the new clutch master / slave setup installed in the car. I have to report that the clutch feels absolutely better than it ever has before. I can shift into reverse without grinding and in first with the clutch out it does not pull forward when revved. Unfortunately it's raining today so I could test the same factors when warm, but I think the problem is solved. With the new master the throw on the slave is a little over 7/8" and before it was more like 5/8".
I confess that I didn't do this fix using the scientific method, I changed 3 things at once. With the help of the guys at ERA I corrected the slave geometry, I replaced the master which was 3/4" bore with one that was 7/8" bore, and for good measure I replaced the slave cylinder. Any one of these could have fixed the problem, probably the most logical being the corrected geometry.
Below are pictures showing the new slave mounting on the aluminum block and the new geometry. I had to grind on the block a little to be able to rotate it to the best position. This seems a little rinky dink, I may decide to redo that at some later date, but for now It should be fine.
March 18, 2006
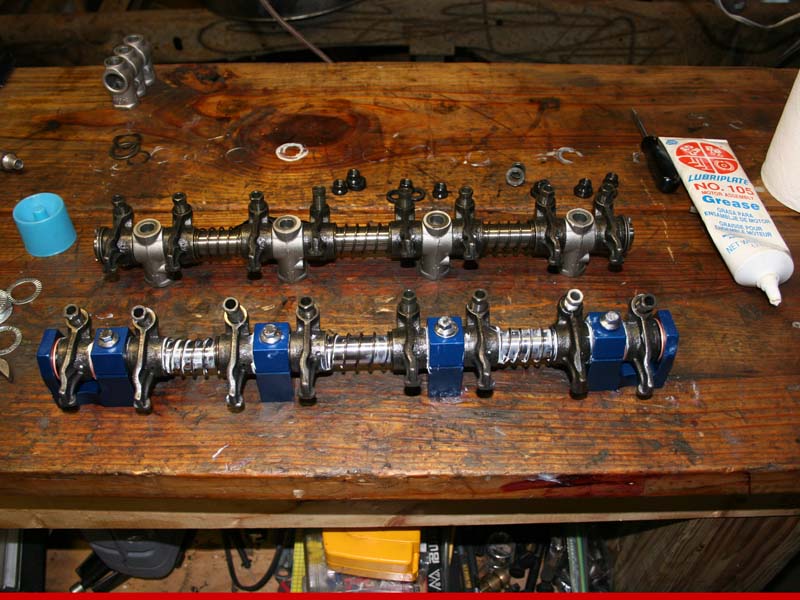
This is one of those stories that start out, "If it isn't one thing, it's another". Last thursday (March 9th) was Men's Expo at Duncan and Evan's school where the Dad's of some of the kids give presentations on various scientific related hobbies, pets, or other cool stuff the kids might be interested in. I brought the cobra and set up a slideshow on the computer showing the build process. We had a nice evening with lots of interest and all was good with the car, ie. the clutch was working great etc. A couple blocks away from home the engine started popping back through the carburetor and running badly. I beat it for the garage and made it home okay. It seemed valve train related and sure enough when I pulled the drivers side valve cover Friday night the end of the rocker shaft had broken removing the exhaust rocker from #5 cylinder. The #5 intake pushrod was also bent into a nice S shape.
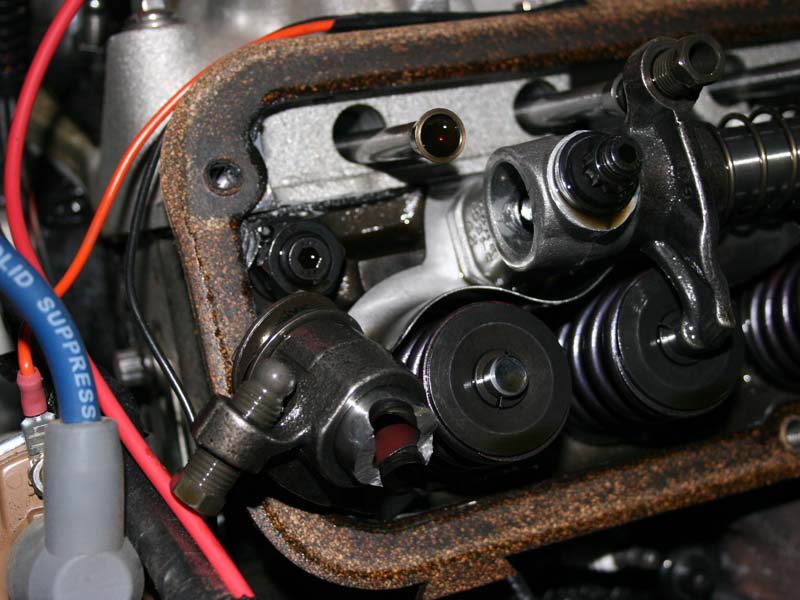
I had chosen the Isky cam for this motor with the idea that the .530 lift and approximately 300# open valve springs would let the stock adjustable rockers setup live, evidently I was wrong. I have since been told that the valve spring pressure combined with the fast ramps of modern cams probably caused this failure. I knew I could fix the rocker problem by using the thicker rocker shafts I had saved for the 427 project, but the big question was whether or not I bent the intake valve associated with the bent pushrod. After removing both rocker shafts and all the spark plugs I checked for a bent valve by pressurizing the #5 cylinder and listening for leaks in the intake manifold, luckily I didn't hear a thing.
I knew I would use the thicker Harland Sharp rocker shafts to fix the problem. At first I also thought I would use the steel rocker shaft stands I had for it too, but they are for the Medium Riser head and are wider than for the Low Riser head of the 390.
What I really wanted was the steel stands for the Low Riser head. Unfortunately these parts are rare because they were only used on 406s and 427s and when you can find them they cost around $200 a set. It ended up being cheaper and arguably better to buy billet stands and end stands (ones that support the end of the rocker shaft) from Doug Garifo at Precision Oil Pumps . These are great pieces and fit perfectly with no problems at all. I finished installing the new rocker setups Friday night (March 17th) and drove the cobra around the block, everything seems to be back to normal. Phew! Below are pictures of the end stand and a comparison of the new vs. old rocker setups. I probably should have gotten the solid spacers vs. using the stock springs between the rockers. Since the bolts / studs keep everything together in this configuration, the springs tend to make everything want to go flying while you try to install them. I have rocker shaft studs on my heads, so what I did was put short bolts in the top while assembling the rockers, these hold the end stands on until they are pushed out by installing the whole assembly onto the studs in the heads.
July 29, 2006
It has been a long time since I updated the website. The latest round of updates to the car were done in anticipation of the Mustang Club of Central Iowa's open track driving event at Mid America Motorplex July 22nd. To pass tech I needed to add a radiator catch can, I found a nice looking aluminum one at Motorsports of KC and mounted it to the inner fender. The only concern was that it would now be a sealed system, after a lot of discussion with various people I decided to drill a small hole near the top of the can as a vent. It's hard to see once installed but there is a petcock at the bottom to drain it.
I also took some steps to hopefully solve a couple of other problems under the hood. The first of which became an issue when Duncan and I want to drive parade laps at a Porsche club event at Heartland Park Topeka in June. At a certain part of the course Duncan said "Hey I see smoke". We stopped and grabbed the fire extinguisher but couldn't see anything, so we headed out again... same smoke same corner. As it turns out the dipstick had come out and some oil blew onto the header. So first of all the dipstick was secured with a spring which hold it down, but it still appeared that we have excessive crankcase pressure to deal with. Originally I just had breathers on both valve covers. What I needed was a PCV system (Positive Crankcase Ventilation). I ended up buying all the original hardware for a '70 428 Cobra Jet from Mansfield Mustang . This included a grommet that goes into the screw on breather hole in the right valve cover, a PCV valve and molded hose. I had to use a small brass plumbing adapter to connect the 1/2" molded hose to a short piece of 3/8" hose connected to the PCV port on the back of my carburetor. On the other valve cover I added a K&N filtered breather part number 62-1490 to hopefully contain more oil than the original breather.
I also took a stab at trying to fix the fuel boil issue mentioned earlier in this page. Someone recommended a carb insulating kit to prevent heat soak of the carburetor. Holley part number 108-70 was ordered and installed. It looks like it will do the job, we'll see when winter fuel comes around again.
These items and a second throttle return spring were all that were needed to satisfy tech for the event.
I also did the "tighten every bolt under the car" bit, flushed and bled the brakes, flushed and bled the hydraulic master cylinder, and put the original hard (squeaky) brake pads back on.
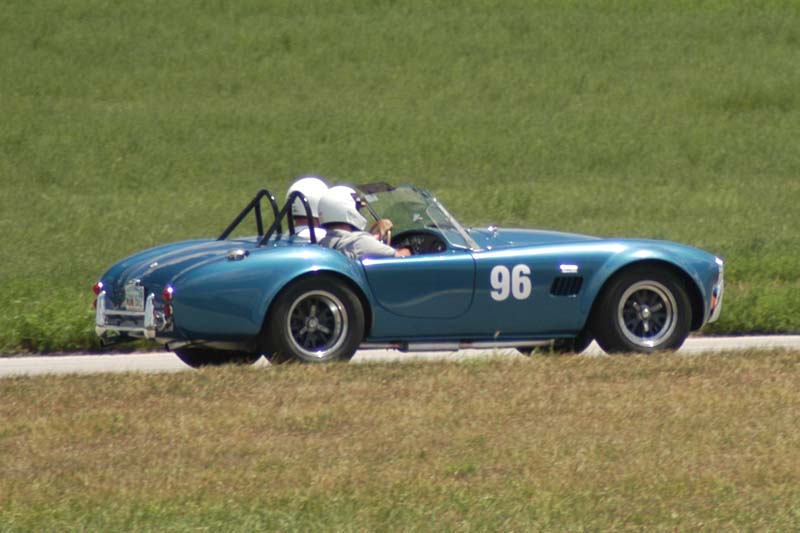
A final and very important item was executed with impressive skill by my wife Wendi. We needed to put numbers on the car that would both stay on at the track and be removed without damaging the paint. I had chosen the number 96 which is the number on the Ed Leslie King Cobra when it raced at Greenwood. Wendi cut the numbers out of white adhesive backed shelf paper and I think they turned out great. No chance of coming off and yet no residue when you pull them off. Total cost about $3. My wife rocks!
I also needed a helmet for the event, I ended up getting a Bell M2 and simpson driving shoes from Saferacer.com , they are in missouri so shipping was incredibly fast even when I had to exchange for a larger size of helmet.
Since I don't have an enclosed trailer and rain was forecast for friday night, I decided to just drive up for the day. A three hour drive and an 8:00 drivers meeting meant I left the house at 4:00 a.m., luckily I tend to get up that early anyway. The drive up was beautiful with a sliver of a moon and lots of stars. It was COLD though (65 degrees) which was odd after 100 degree temps earlier in the week. The weather for the event couldn't have been better, in the low 80s. Long time good friend Jeff Lacina was running the event. He has been the head driving instructor for SVTOA for several years and he really is good at it. He was nice enough to ride with me for 3 of the 4 20 minute driving sessions. The event was an absolute blast, I can't even describe how much fun it was. I did spin out one time, Jeff says if you don't spin at least once you aren't trying hard enough. I guess that may be true but this being my first open track event I don't think I pushed it _that_ hard. The car performed pretty decent except it did slip out of 3rd gear with irritating frequency, I guess I will be going back through the tranny this winter. Because of my inexperience, need for practice heel-toe downshifting, and the torque of the big block, we ran in 3rd gear most of the time. On the two longish straights I'd go into 4th and get up to around 100 mph. We had transponders in the car but I haven't seen any lap times yet, hopefully the club will post them on their website. I'm sure mine are abysmal but I'd still like to see them. Above all I got to wring the car out like never before and had a great time, I definitely want to do it again. The following pictures were taken by Patt Buell.
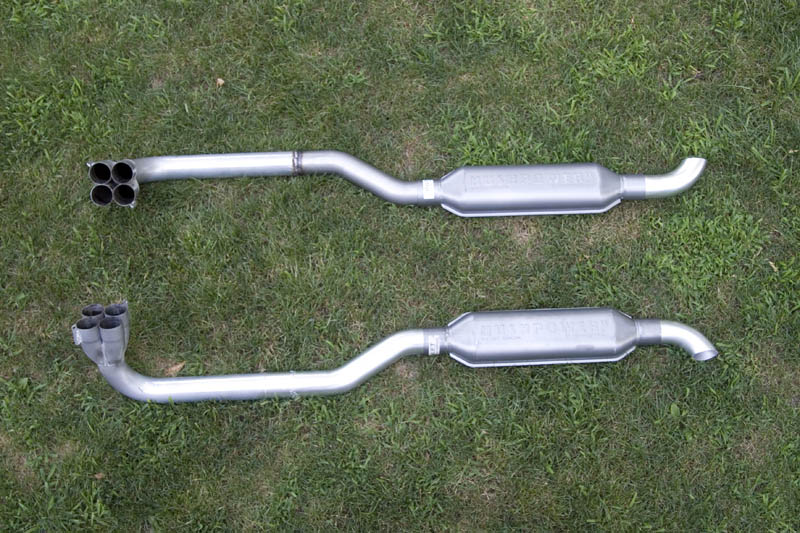
We have the car apart for a few upgrades getting ready for a long trip in July. Duncan and I are going to drive it up to Road America in Wisconsin to watch the Brian Redman vintage race. Other than normal maintenance items we are upgrading the exhaust and having someone fit the soft top. The exhaust has been a problem since the beginning. It's restrictive mufflers and 2" crimp bent tail pipe has hurt performance and made the carb very hard to tune. That's the theory anyway, we'll see. I decided on 2 1/2" Flowmaster HushPower II mufflers because they are narrow and will fit between the frame and the side of the car. To do that I cut off the 2 1/2" to 2" reducer on the end of my headers and add a mandrel bent S curve to move the mufflers in from the side of the car. Then I made little dumps that will shoot out in front of the rear tire. It was a tight fit because of the length of the S curve and the mufflers but it worked. I just need to fabricate hangers that will come off the clamp that holds the dumps on. I welded up the driver side last night and will try to get it installed tonight.
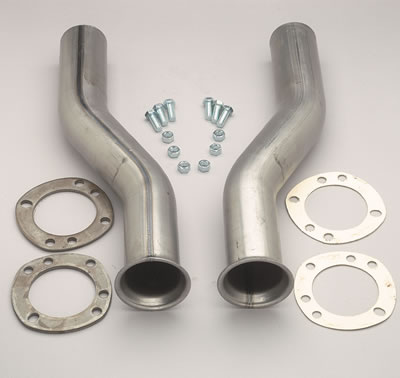
The S-curve pieces of pipe were kind of a lucky find. I found a header extension from Hedman that was perfect. Part # 18806. Just cut the flange off and welded them to my headers.
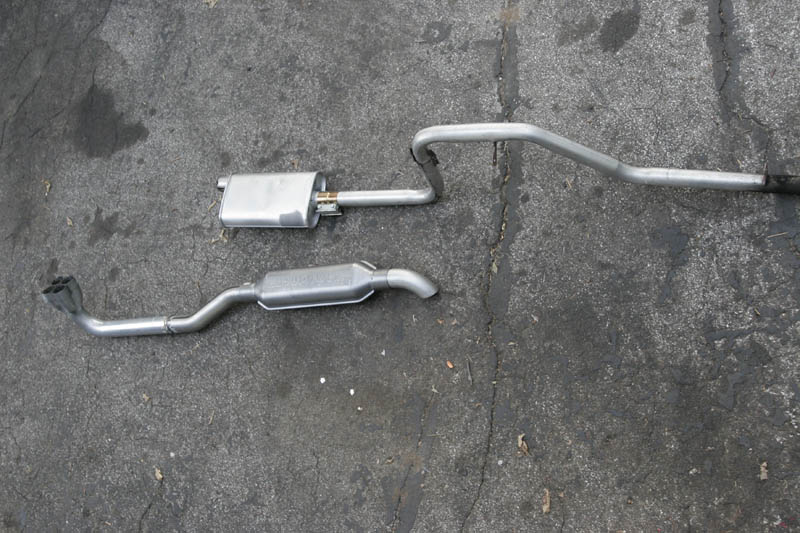
New vs. Old Exhaust. New is 2 1/2", old is 2".
Today I got the other side of the exhaust header fabricated. I also have painted both sides with Dupli-Color silver 1200 degree paint. It's really an amazing match to the Airborn Coatings ceramic coating on the front end of the header. Tomorrow I hope to get hangers fabricated and maybe get the while thing installed. We'll see. So far I think it looks pretty good. Here are the two sides together.
Last night I got the exhaust hanger fabricated and the drivers side exhaust fully installed. I think the hanger turned out pretty good, it's very solid with just rubber washers for vibration damping. The exhaust is a little more visible from the side of the car than I would like, but there isn't much I can do about that. Hopefully I'll get the other side finished next weekend and try it out.
I finished everything on my list for the cobra and got it out tonight. It is louder than before which isn't too surprising. I'm not sure if it has more to do with the fact that it's right by your head or the mufflers. But it's a nice sound, not offensive. It seems to run fine, I fiddled with the carburetor a while and didn't make much difference. This weekend I decided to extend the dumps out to clear the body and went and picked up some mandrel bent 90s at Motorsports of KC. I did have a little trouble though, when I was taking it down off the jack stands the front end fell trapping the jack stands under the car. I had visions of broken headers but actually the only damage I have found so far is a flattened brake line. So tomorrow night I will be fixing that. I feel lucky there wasn't more damage... gee I really need a lift :).
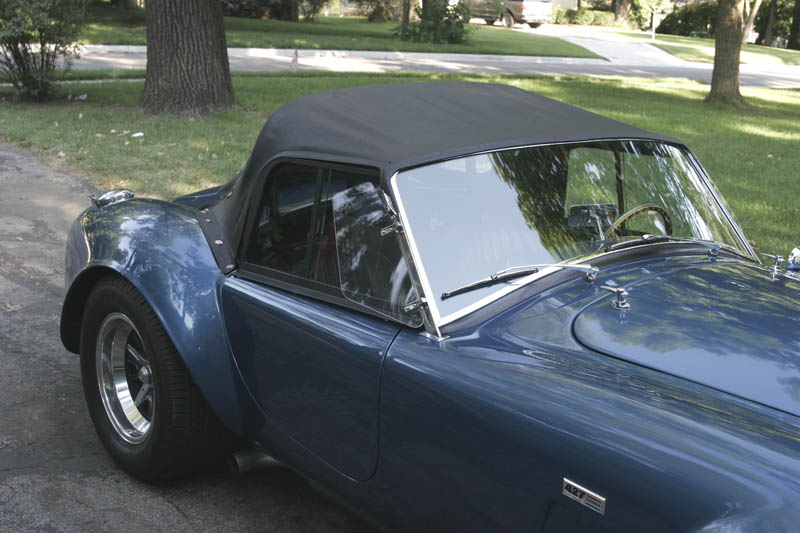
On Saturday Don Bennefeld came over to fit the top. He worked on it all day and it was a real challenge. He has been doing custom upholstery for 40 years but had never done a cobra top before. The big challenges were the slits for the down tubes for the two roll bars. All and all it turned out pretty well, he ran a little short of material to make the covers for the down tubes. And also the back bow was ineffective because of the roll bars so I removed it. I drove it on the interstate today and amazingly it's pretty quiet, it doesn't flop around and no wind whistles to speak of. Since our intent is to only use it in case of rain on a long trip I think it will work out just fine.